Resend
ShipAny integrates Resend as an email service provider, which can be used for scenarios such as sending login verification codes, sending customer welcome emails, and sending subscription notifications.
Quick Start
Follow the steps below to quickly integrate Resend email service into your project.
Visit the Resend website and register an account.
In the Resend console, go to the Domains page, click the Add Domain button, and add an email domain.
It can be a subdomain or main domain. For example: mail.shipany.codes
Follow the instructions to complete DNS resolution and verification of the email domain.
In the Resend console, go to the API Keys page, click the Create API Key button, and create an API key.
In the project management backend, go to the Settings -> Email -> Resend panel,
Enter the API key created in the previous step in the Resend API Key field.
Enter an email address for sending emails in the Resend Sender Email field. The domain must match the email domain added in the Resend console. The email alias before the @ symbol can be specified arbitrarily, for example: no-reply@mail.shipany.codes.
If you need to display the sender name, you can fill in the email address with the sender name, for example:
ShipAny Two <no-reply@mail.shipany.codes>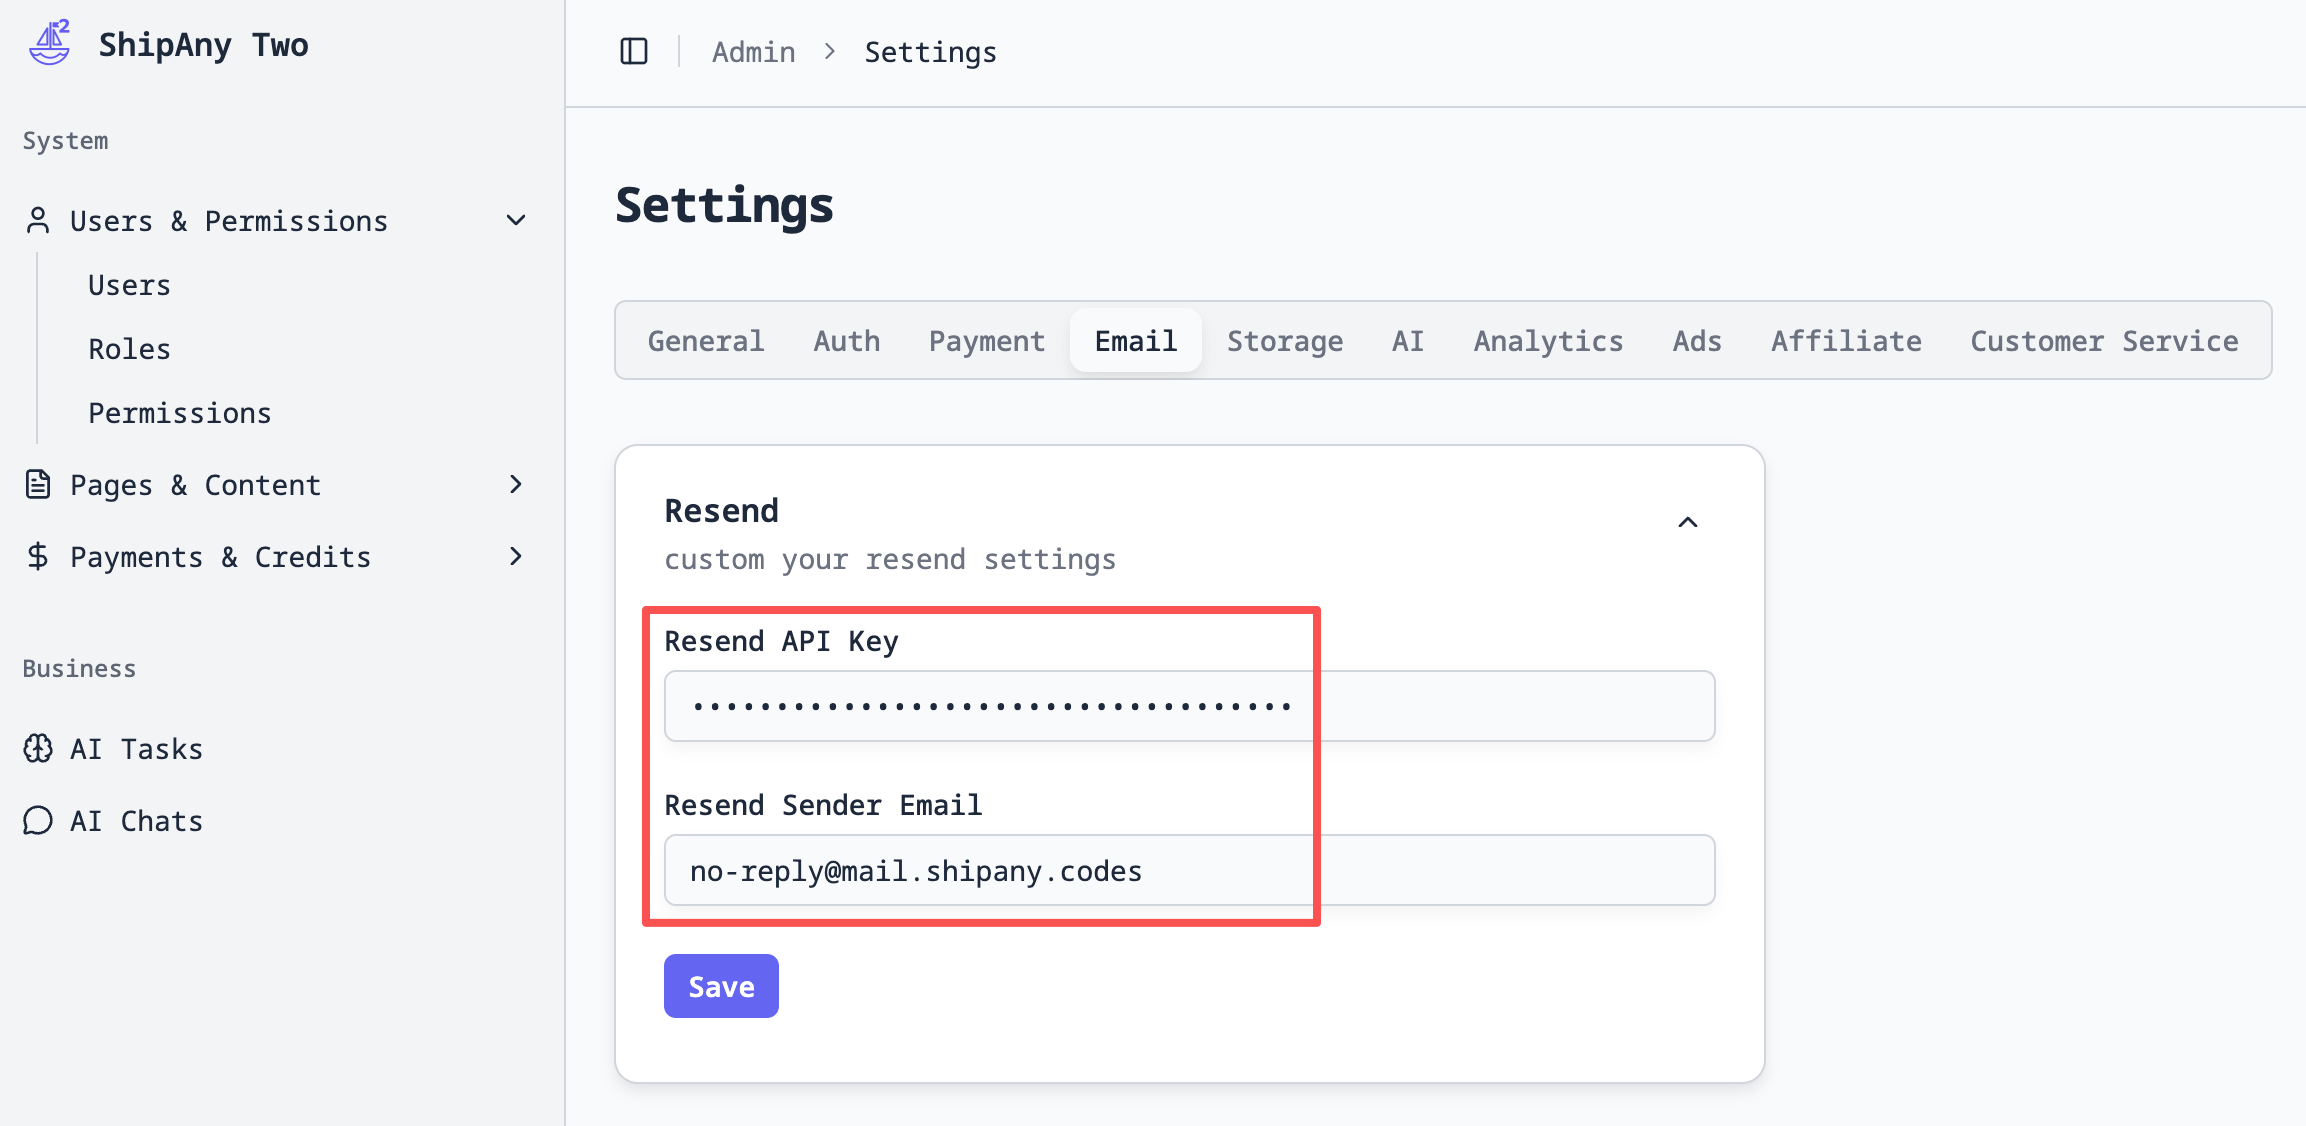
Use the curl command to request the project's email sending API and test email sending capability:
curl -X POST https://{your-domain}/api/email/send-email \
  -H "Content-Type: application/json" \
  -d '{
    "emails":["support@xxx.com"],
    "subject":"Test Email"
  }'
After a successful request, the curl command will return the email sending result:
{
"code": 0,
"message": "ok",
"data": {
"success": true,
"messageId": "xxx",
"provider": "resend"
}
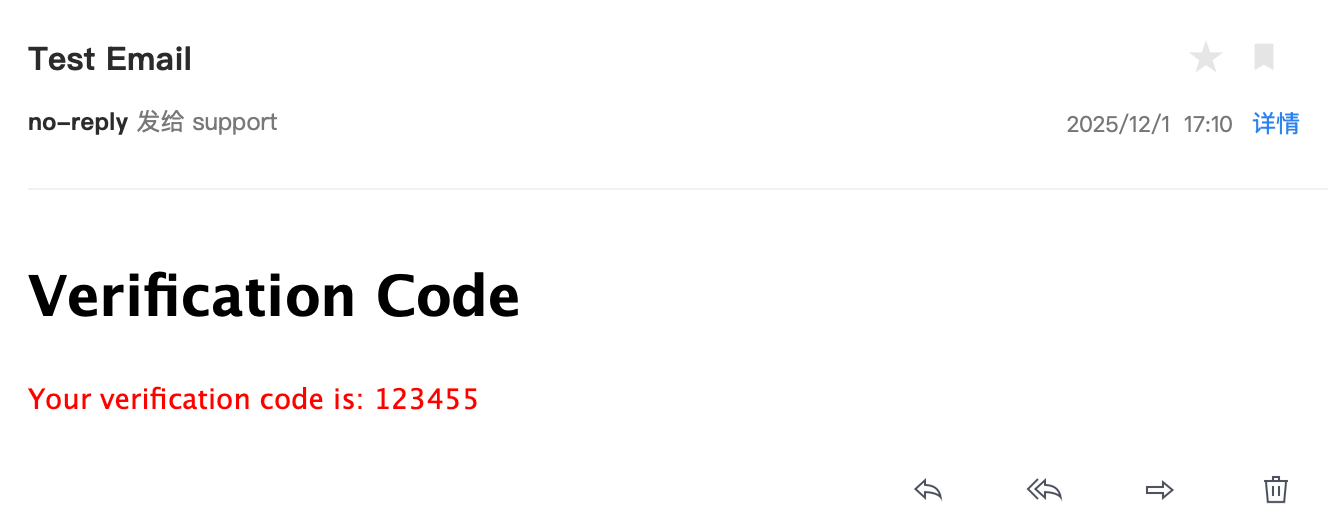
}The email recipient can log into their email account and see the email content as follows:
At this point, the Resend email service is successfully configured, and you can use Resend to send emails in your project.
Custom Email Sending
You can customize the way and content of sending emails in your project according to specific business requirements.
Send Plain Text Email
import { getEmailService } from '@/shared/services/email';

const emails = ['support@xxx.com'];
const subject = 'Test Email';

const emailService = await getEmailService();
const emailProvider = emailService.getProvider('resend');

const result = await emailProvider.sendEmail({
  to: emails,
  subject: subject,
  text: 'Hello World.',
});

console.log('send email result', result);
Send HTML Rich Text Email
import { getEmailService } from '@/shared/services/email';

const emails = ['support@xxx.com'];
const subject = 'Test Email';

const emailService = await getEmailService();
const emailProvider = emailService.getProvider('resend');

const result = await emailProvider.sendEmail({
  to: emails,
  subject: subject,
  html: '<p style="color: red;">Hello from <a href="https://shipany.ai">ShipAny</a>.</p>',
});

console.log('send email result', result);
Send Template Email
First, define an email template using React components in your project files.
For example, define a verification code email template in the src/shared/blocks/email/verification-code.tsx file:
export function VerificationCode({ code }: { code: string }) {
  return (
    <div>
      <h1>Verification Code</h1>
      <p style={{ color: 'red' }}>Your verification code is: {code}</p>
    </div>
  );
}import { VerificationCode } from '@/shared/blocks/email/verification-code';
import { getEmailService } from '@/shared/services/email';
const emails = ['support@xxx.com'];
const subject = 'Test Email';
const emailService = await getEmailService();
const emailProvider = emailService.getProvider('resend');
const result = await emailProvider.sendEmail({
to: emails,
subject: subject,
react: VerificationCode({ code: '123455' }),
});
console.log('send email result', result);Build Email Templates with React Email
React Email is a library for building email templates, which can be used to build complex email templates.
You need to install the react-email library in your project:
pnpm add @react-email/componentsUse the React Email component library to build email templates.
For example, define an email template in the src/shared/blocks/email/react-email.tsx file:
import * as React from 'react';
import { Button, Html } from '@react-email/components';

export function ReactEmail(props: { url: string }) {
  const { url } = props;

  return (
    <Html lang="en">
      <Button href={url}>Click me</Button>
    </Html>
  );
}import { ReactEmail } from '@/shared/blocks/email/react-email';
import { getEmailService } from '@/shared/services/email';
const emails = ['support@xxx.com'];
const subject = 'Test Email';
const emailService = await getEmailService();
const emailProvider = emailService.getProvider('resend');
const result = await emailProvider.sendEmail({
to: emails,
subject: subject,
react: ReactEmail({ url: 'https://shipany.ai' }),
});
console.log('send email result', result);You can find some commonly used email templates in the React Email template marketplace,
copy them into your project files, and import them directly for use.