Cloudflare R2
ShipAny projects require file storage service configuration to enable image upload functionality, which affects features like user avatar editing and AI-generated image storage.
Quick Start
Follow these steps to configure Cloudflare R2 file storage for your project.
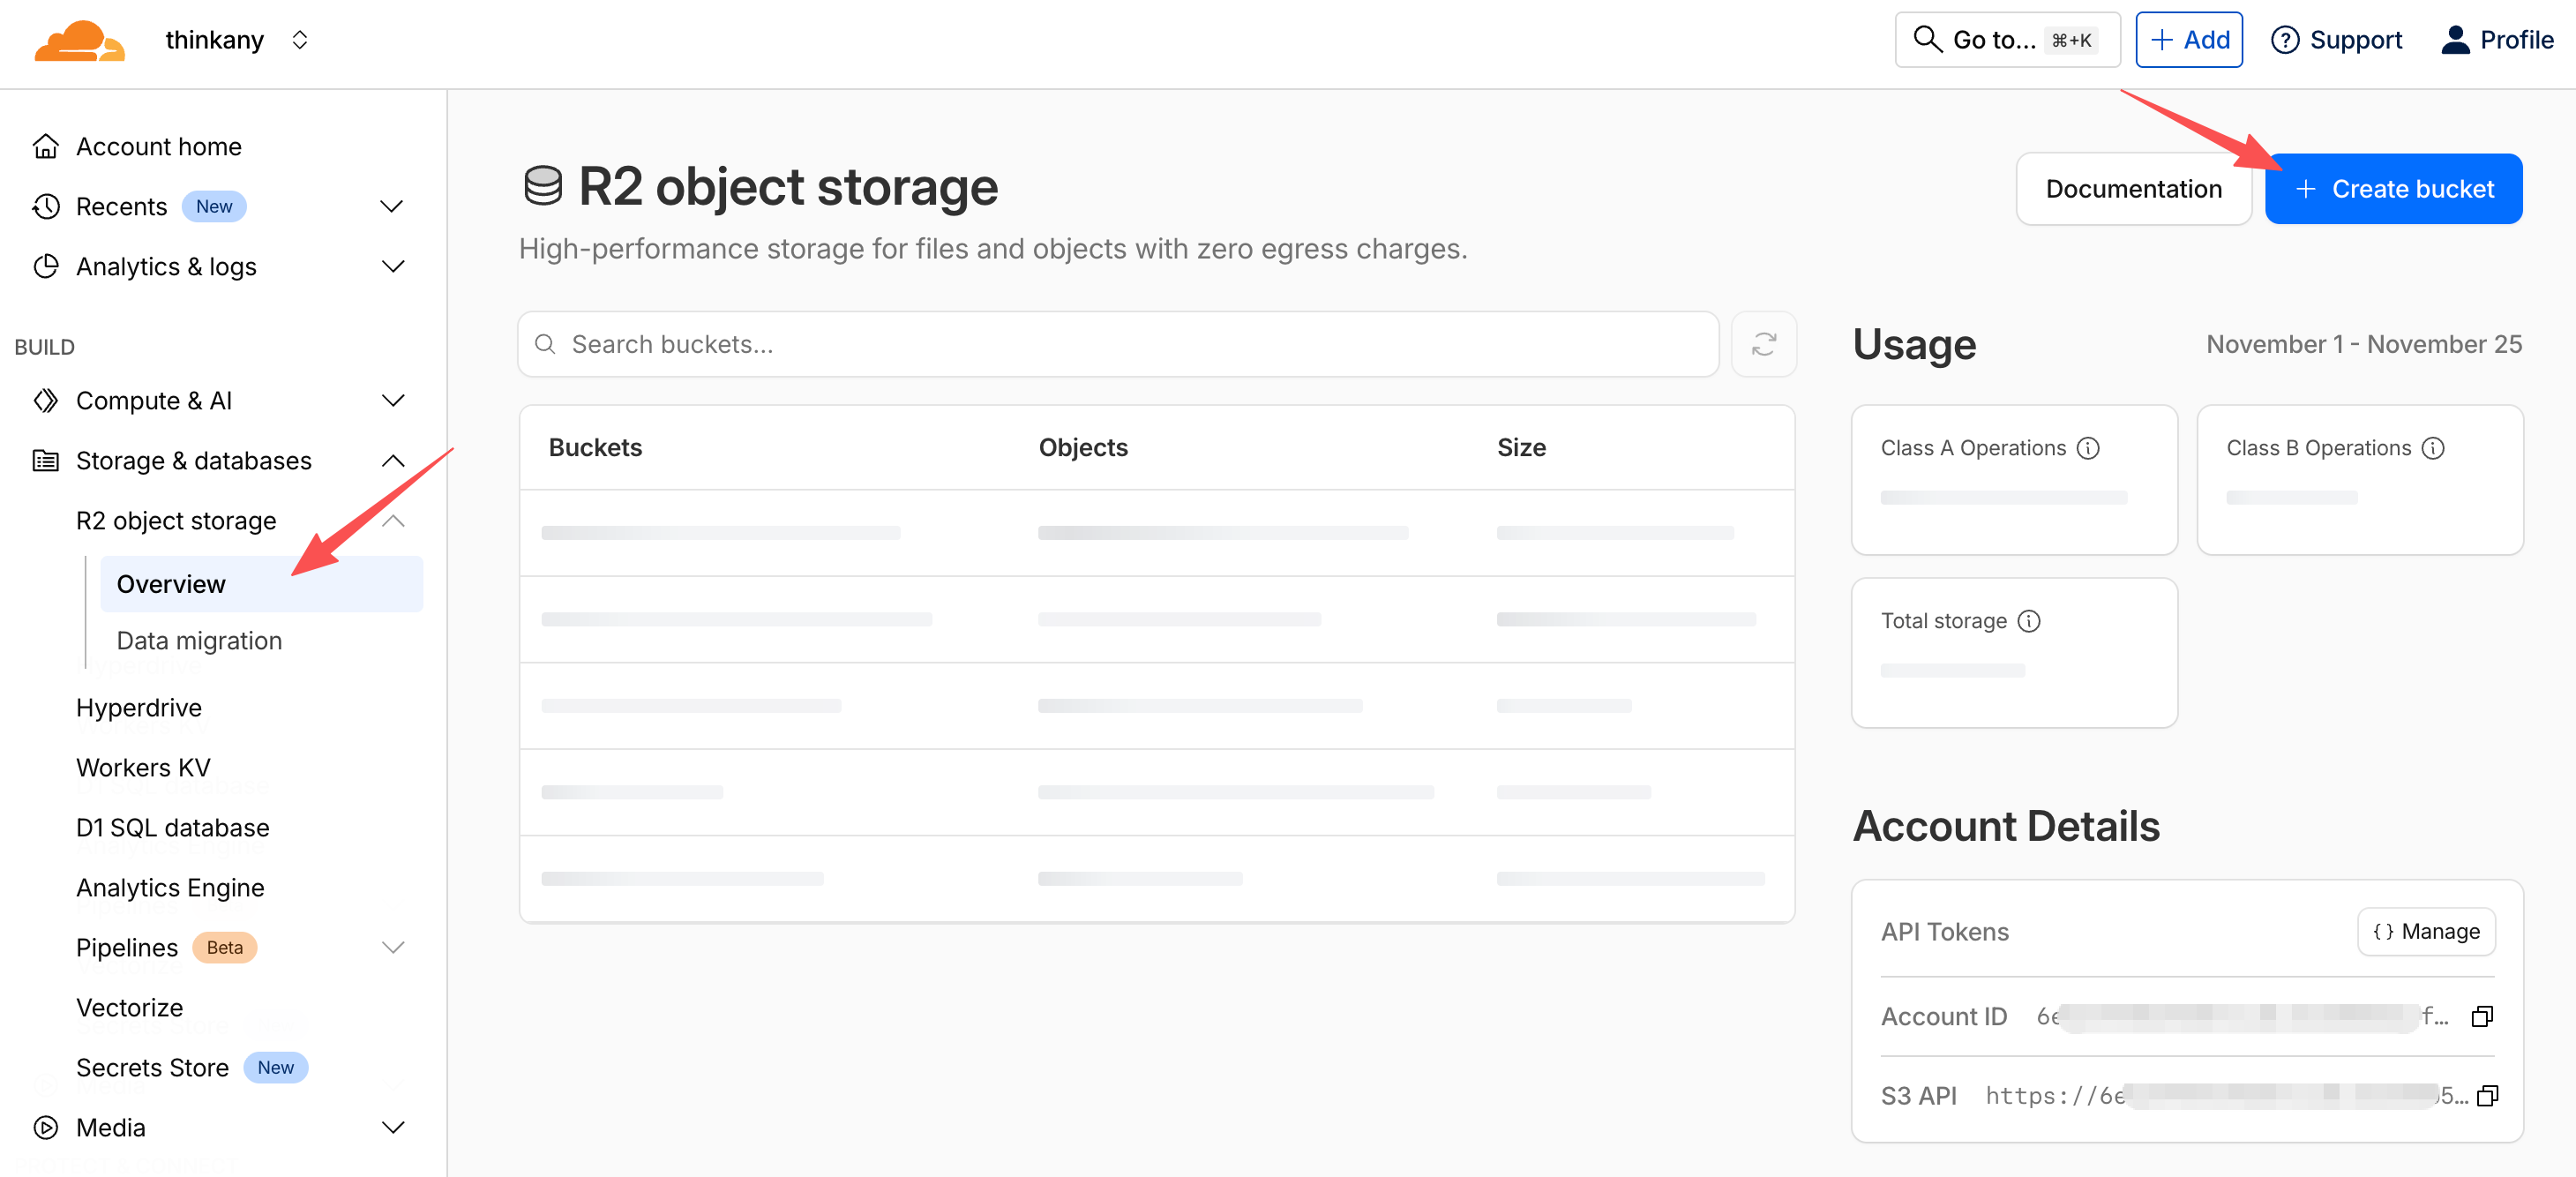
Navigate to the Storage & databases -> R2 object storage -> Overview page in the Cloudflare dashboard, and click the Create bucket button to create a bucket.
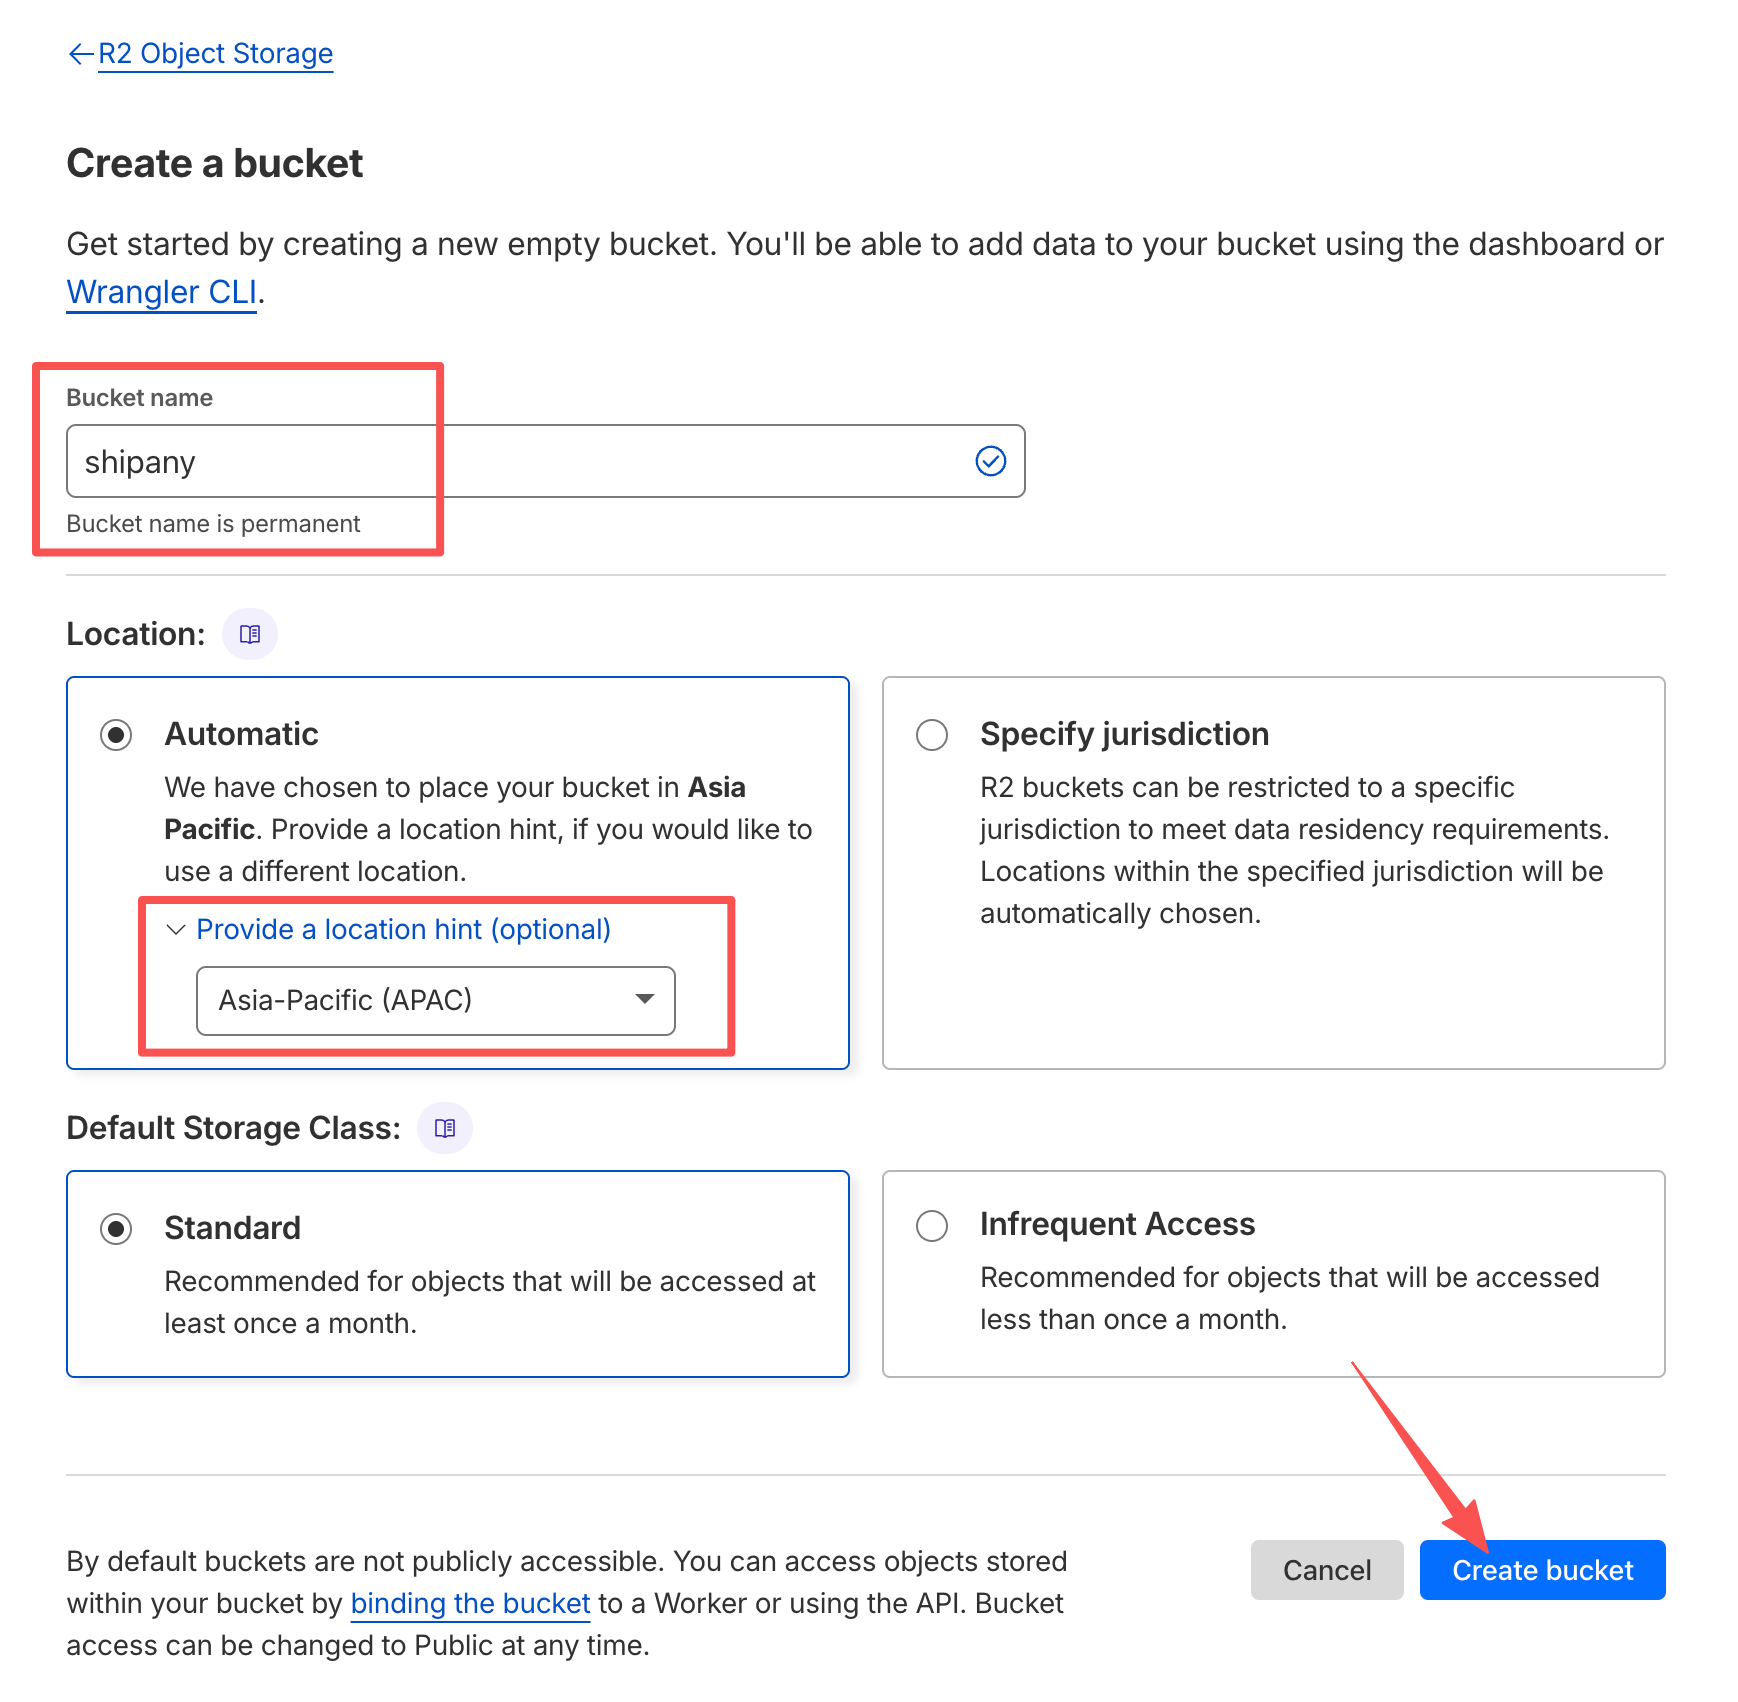
Fill in the bucket name, select the bucket region (or use the default region), and click the Create button to create the bucket.
Go to the bucket settings page, and click the Enable button next to Public Development URL to enable the default access domain for the bucket.
The access domain you get after enabling will look like:
https://pub-xxx.r2.devThe default access domain for the bucket has rate limits and can be used during development and debugging. For production deployments, it's recommended to configure a custom domain.
Click the Add button next to Custom Domains to add a custom domain. Enter your custom domain in the popup input box, for example: r2.shipany.ai
You may need to configure DNS resolution for your custom domain. If your domain is hosted on Cloudflare, DNS records will be automatically added after adding the domain.
The final bucket access domain you get will look like:
https://r2.shipany.ai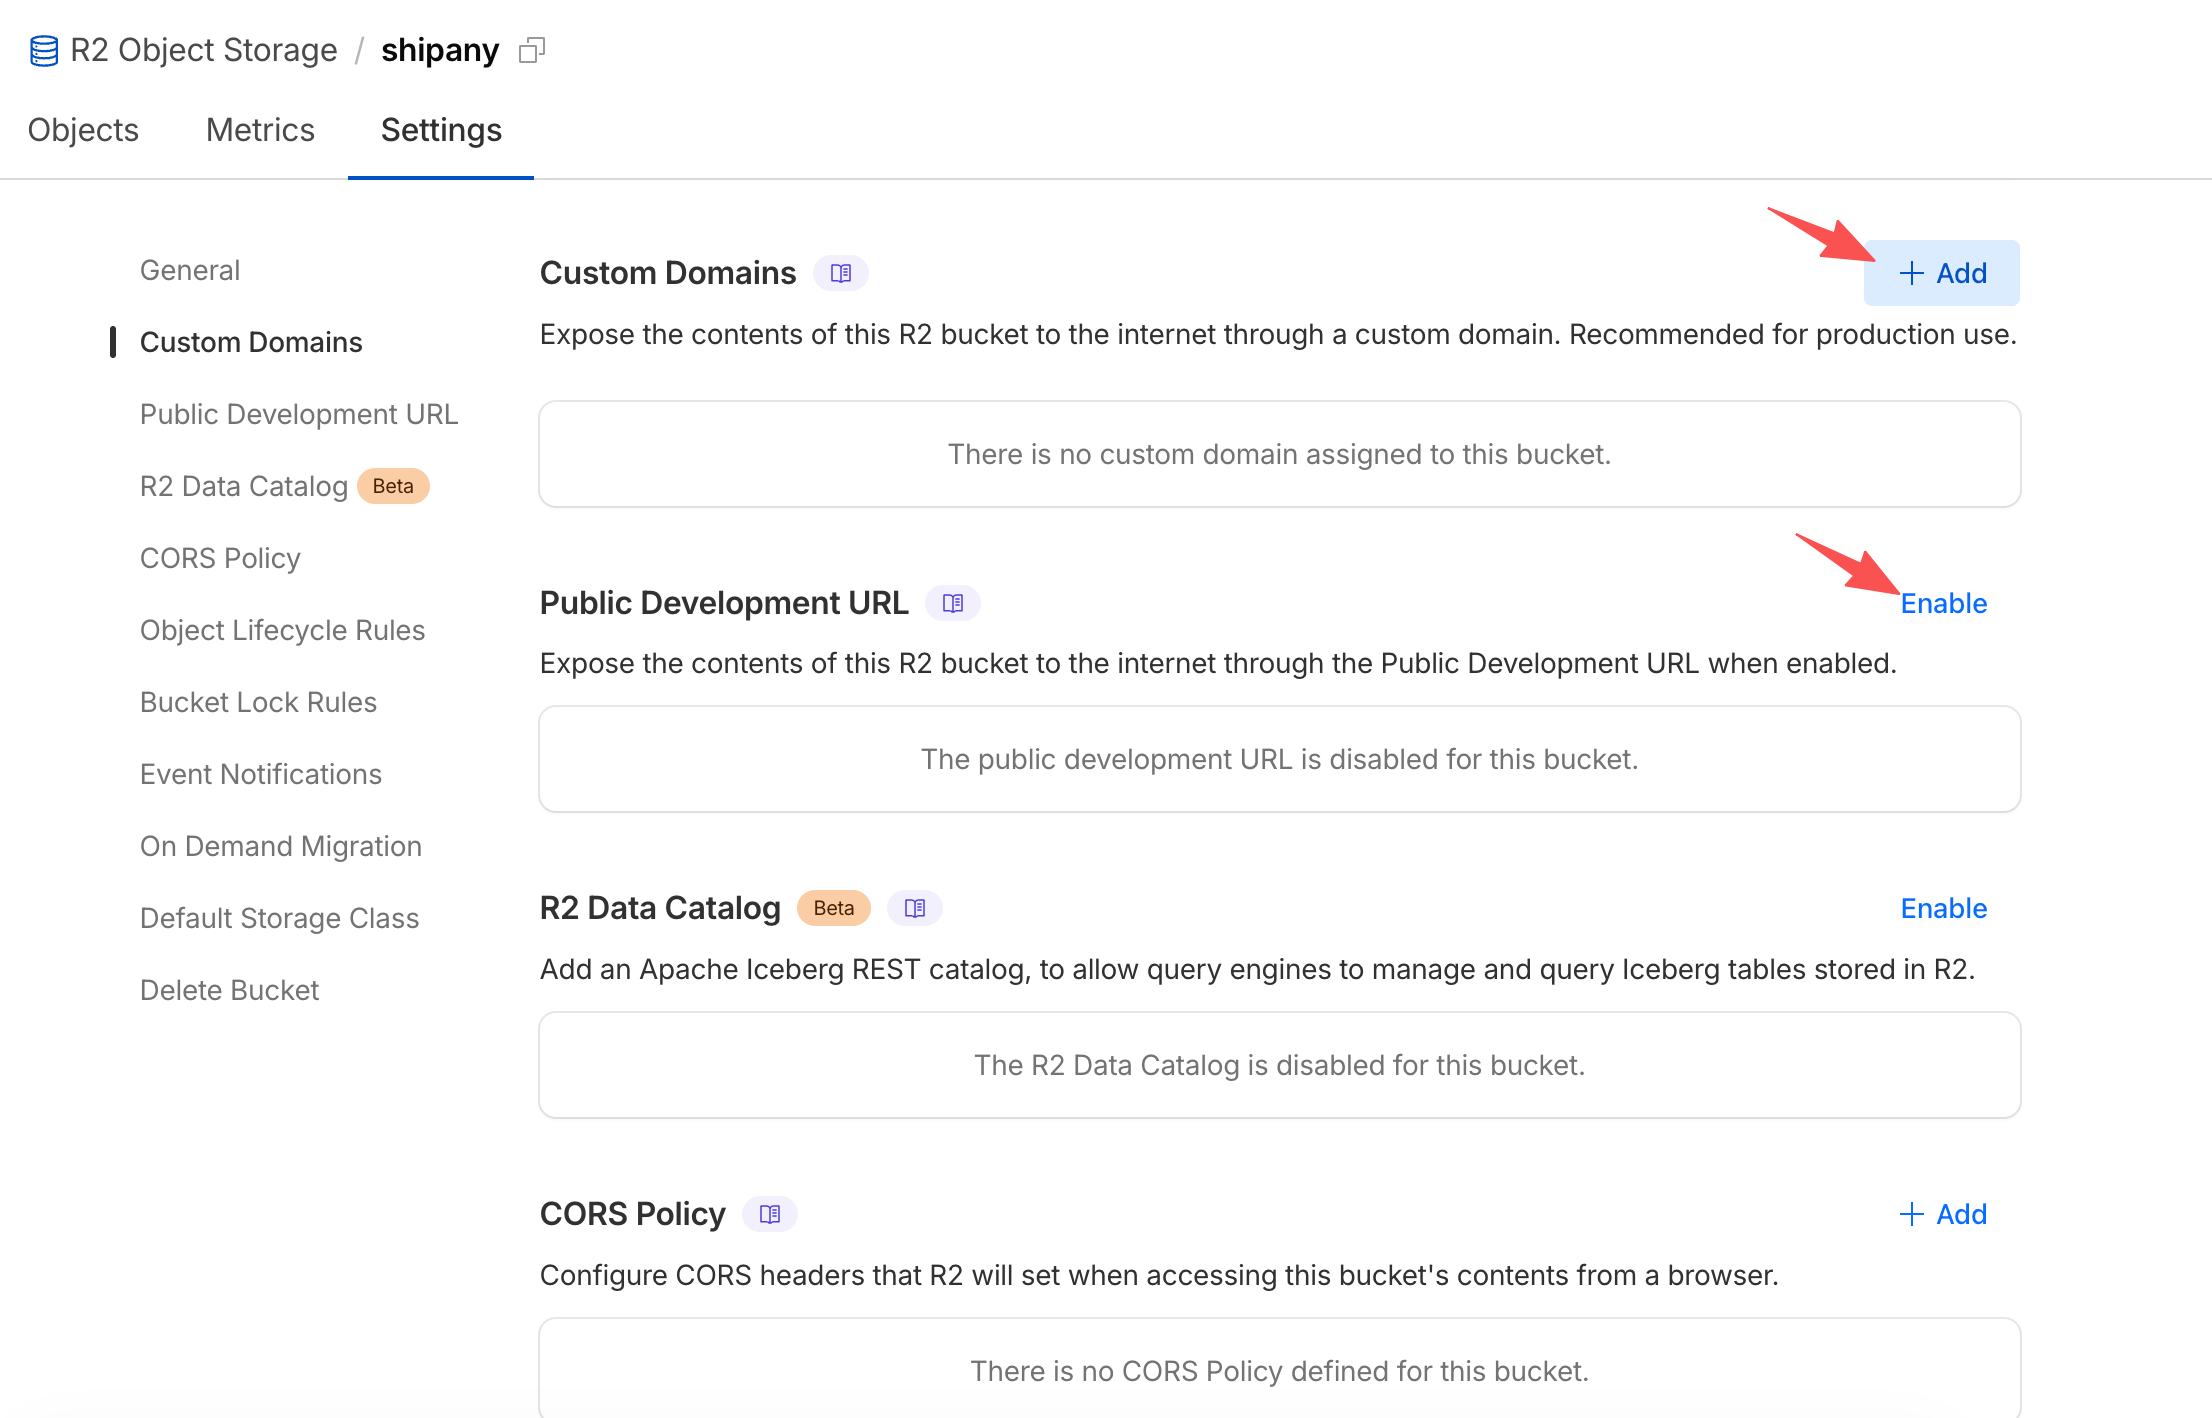
Return to the R2 object storage page from the first step, click the Manage button next to Account Details -> API Tokens in the bottom right corner to access the API credentials management page.
Click the Create User API token button next to User API Tokens to create API credentials.
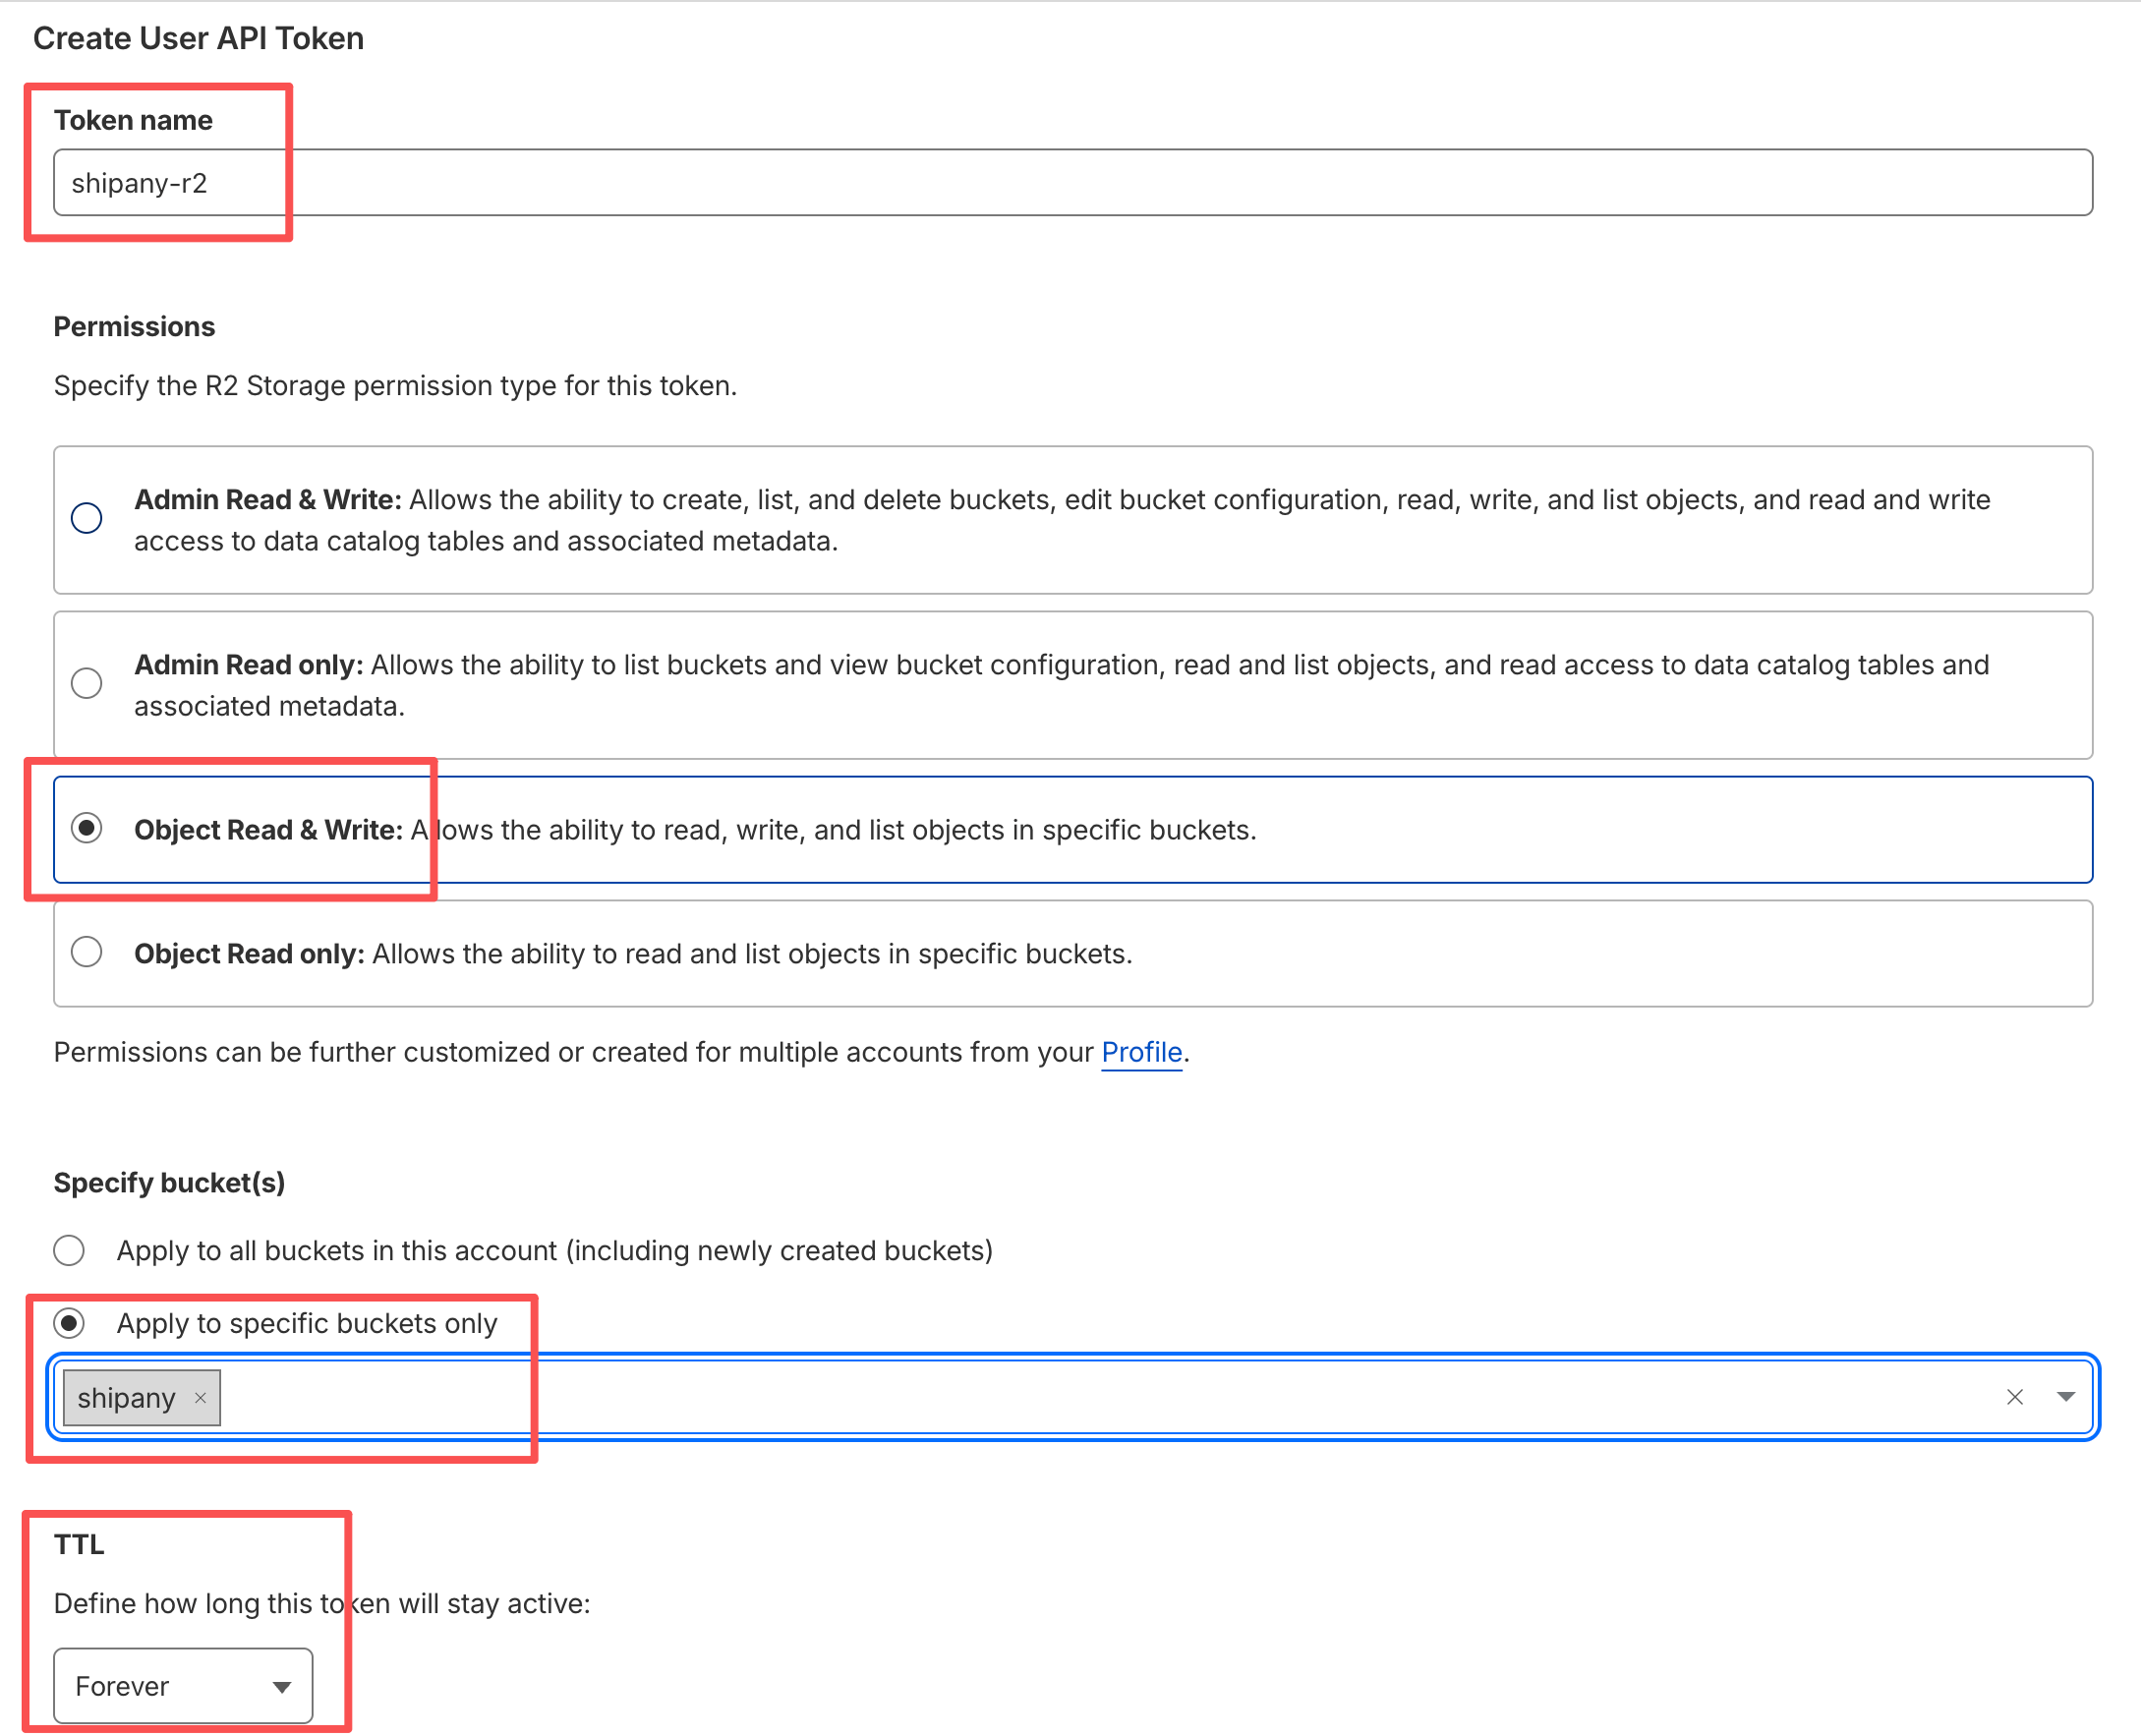
Click the Create User API Token button to create API credentials for accessing the bucket.
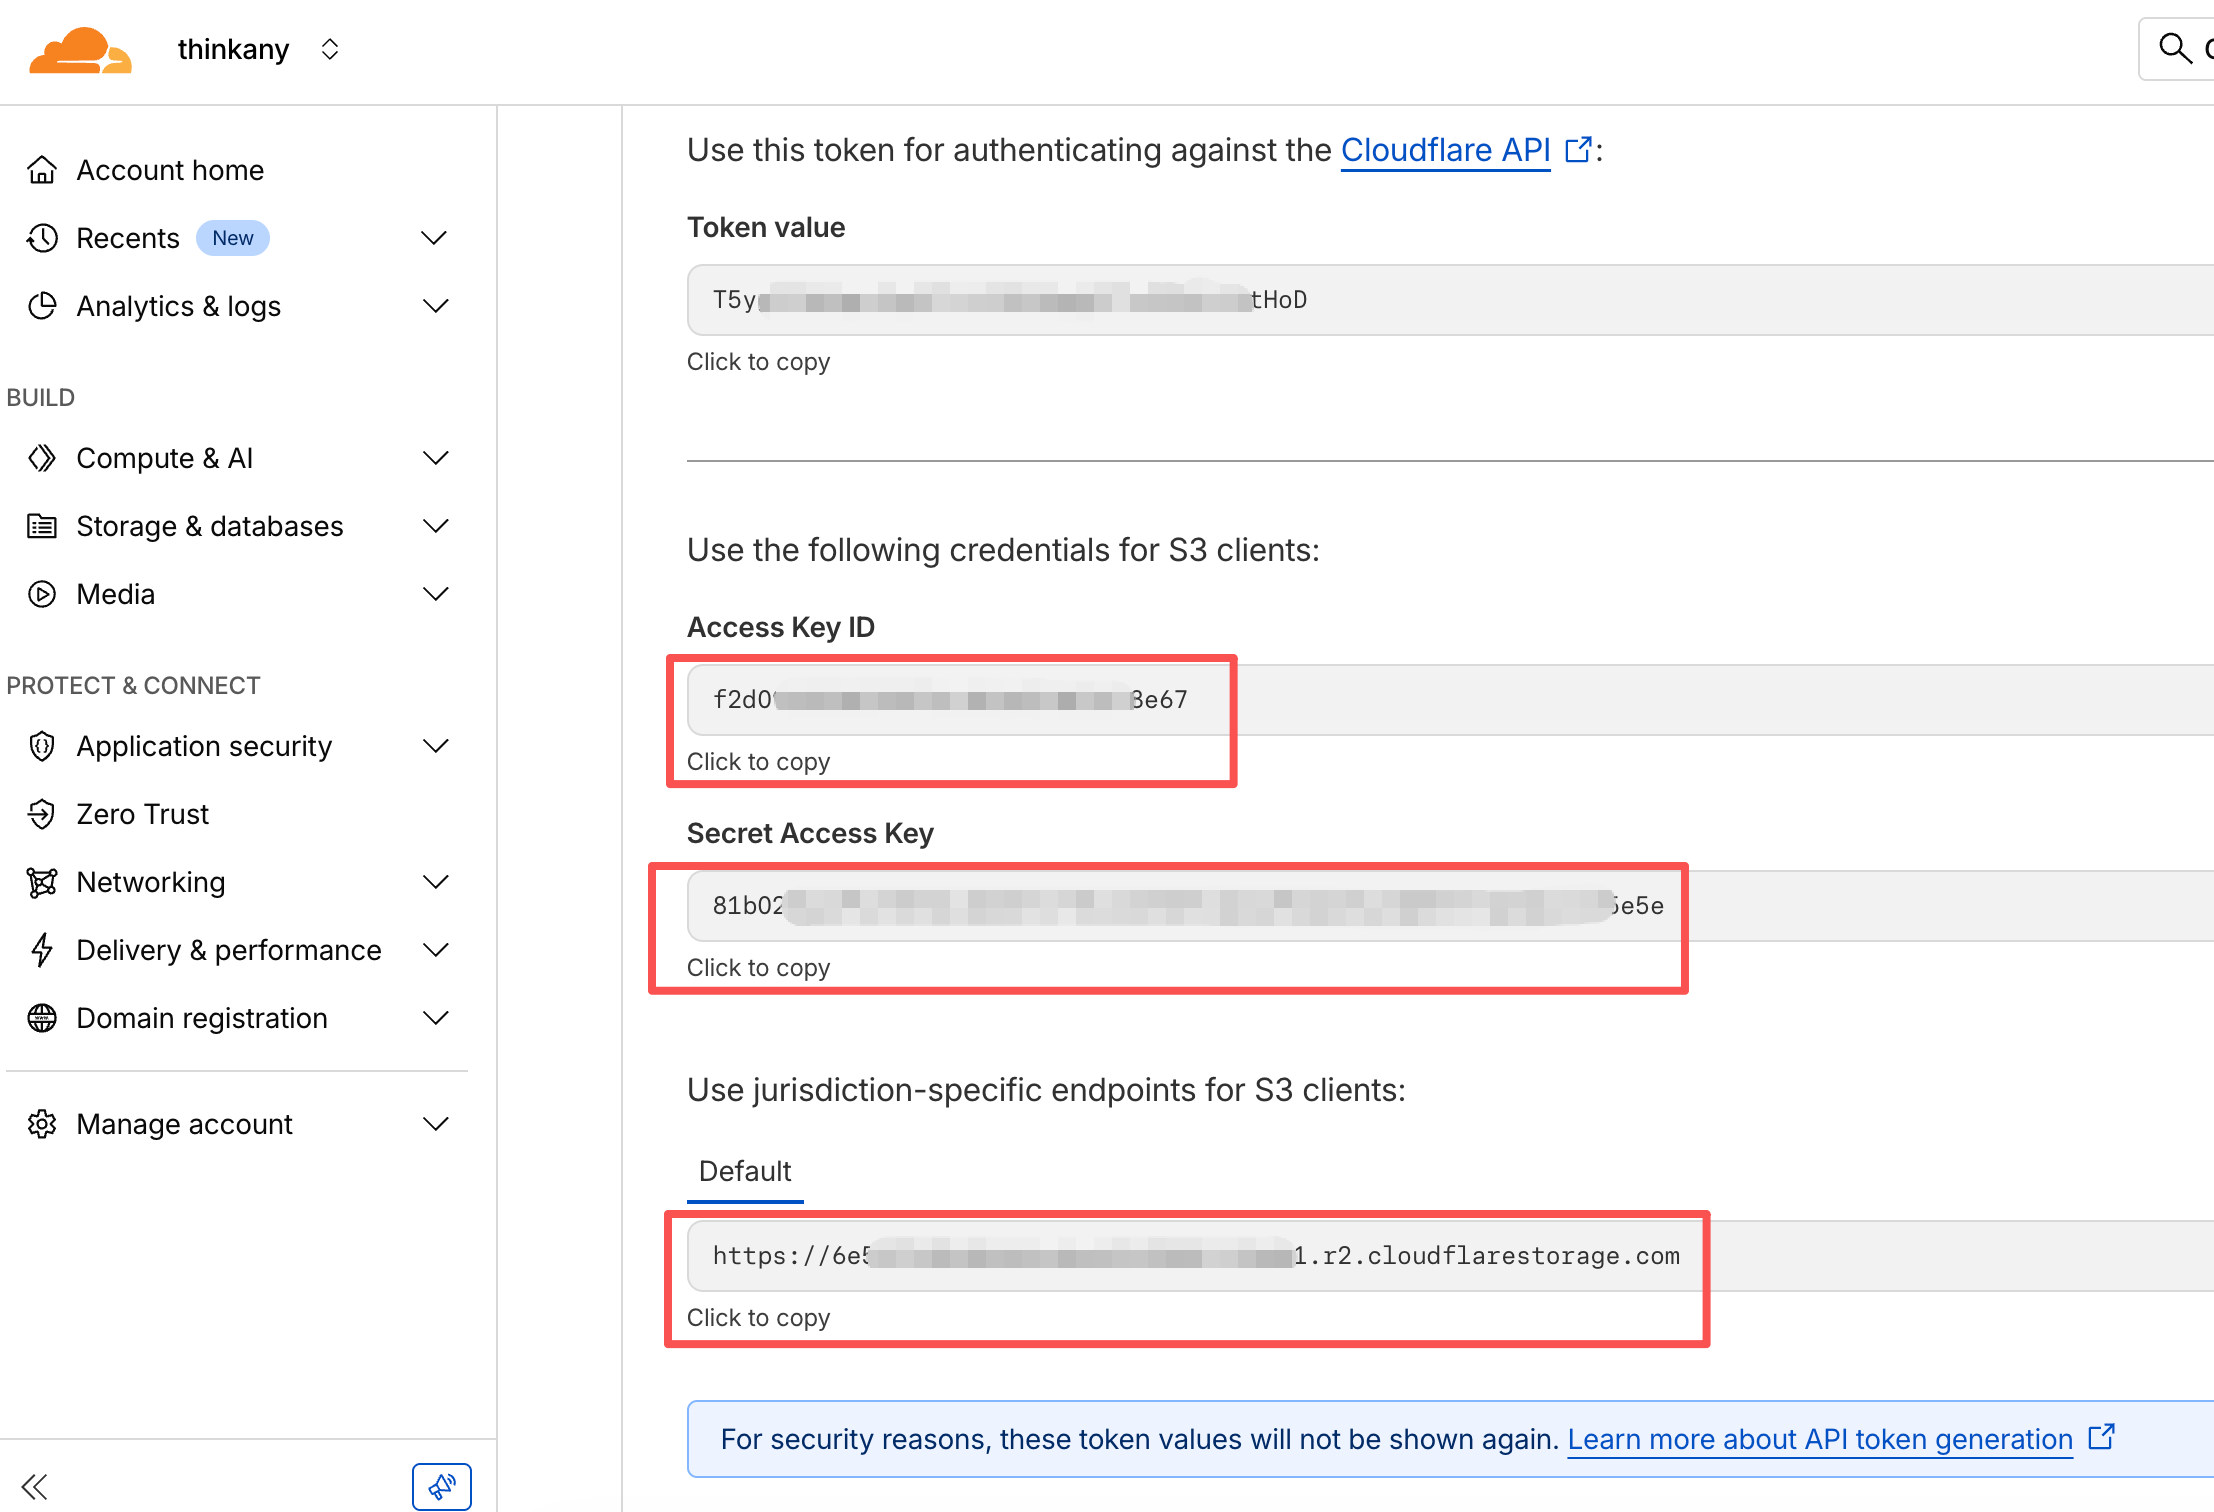
On the credentials display page, copy the Access Key ID, Secret Access Key, and the three values under Default.
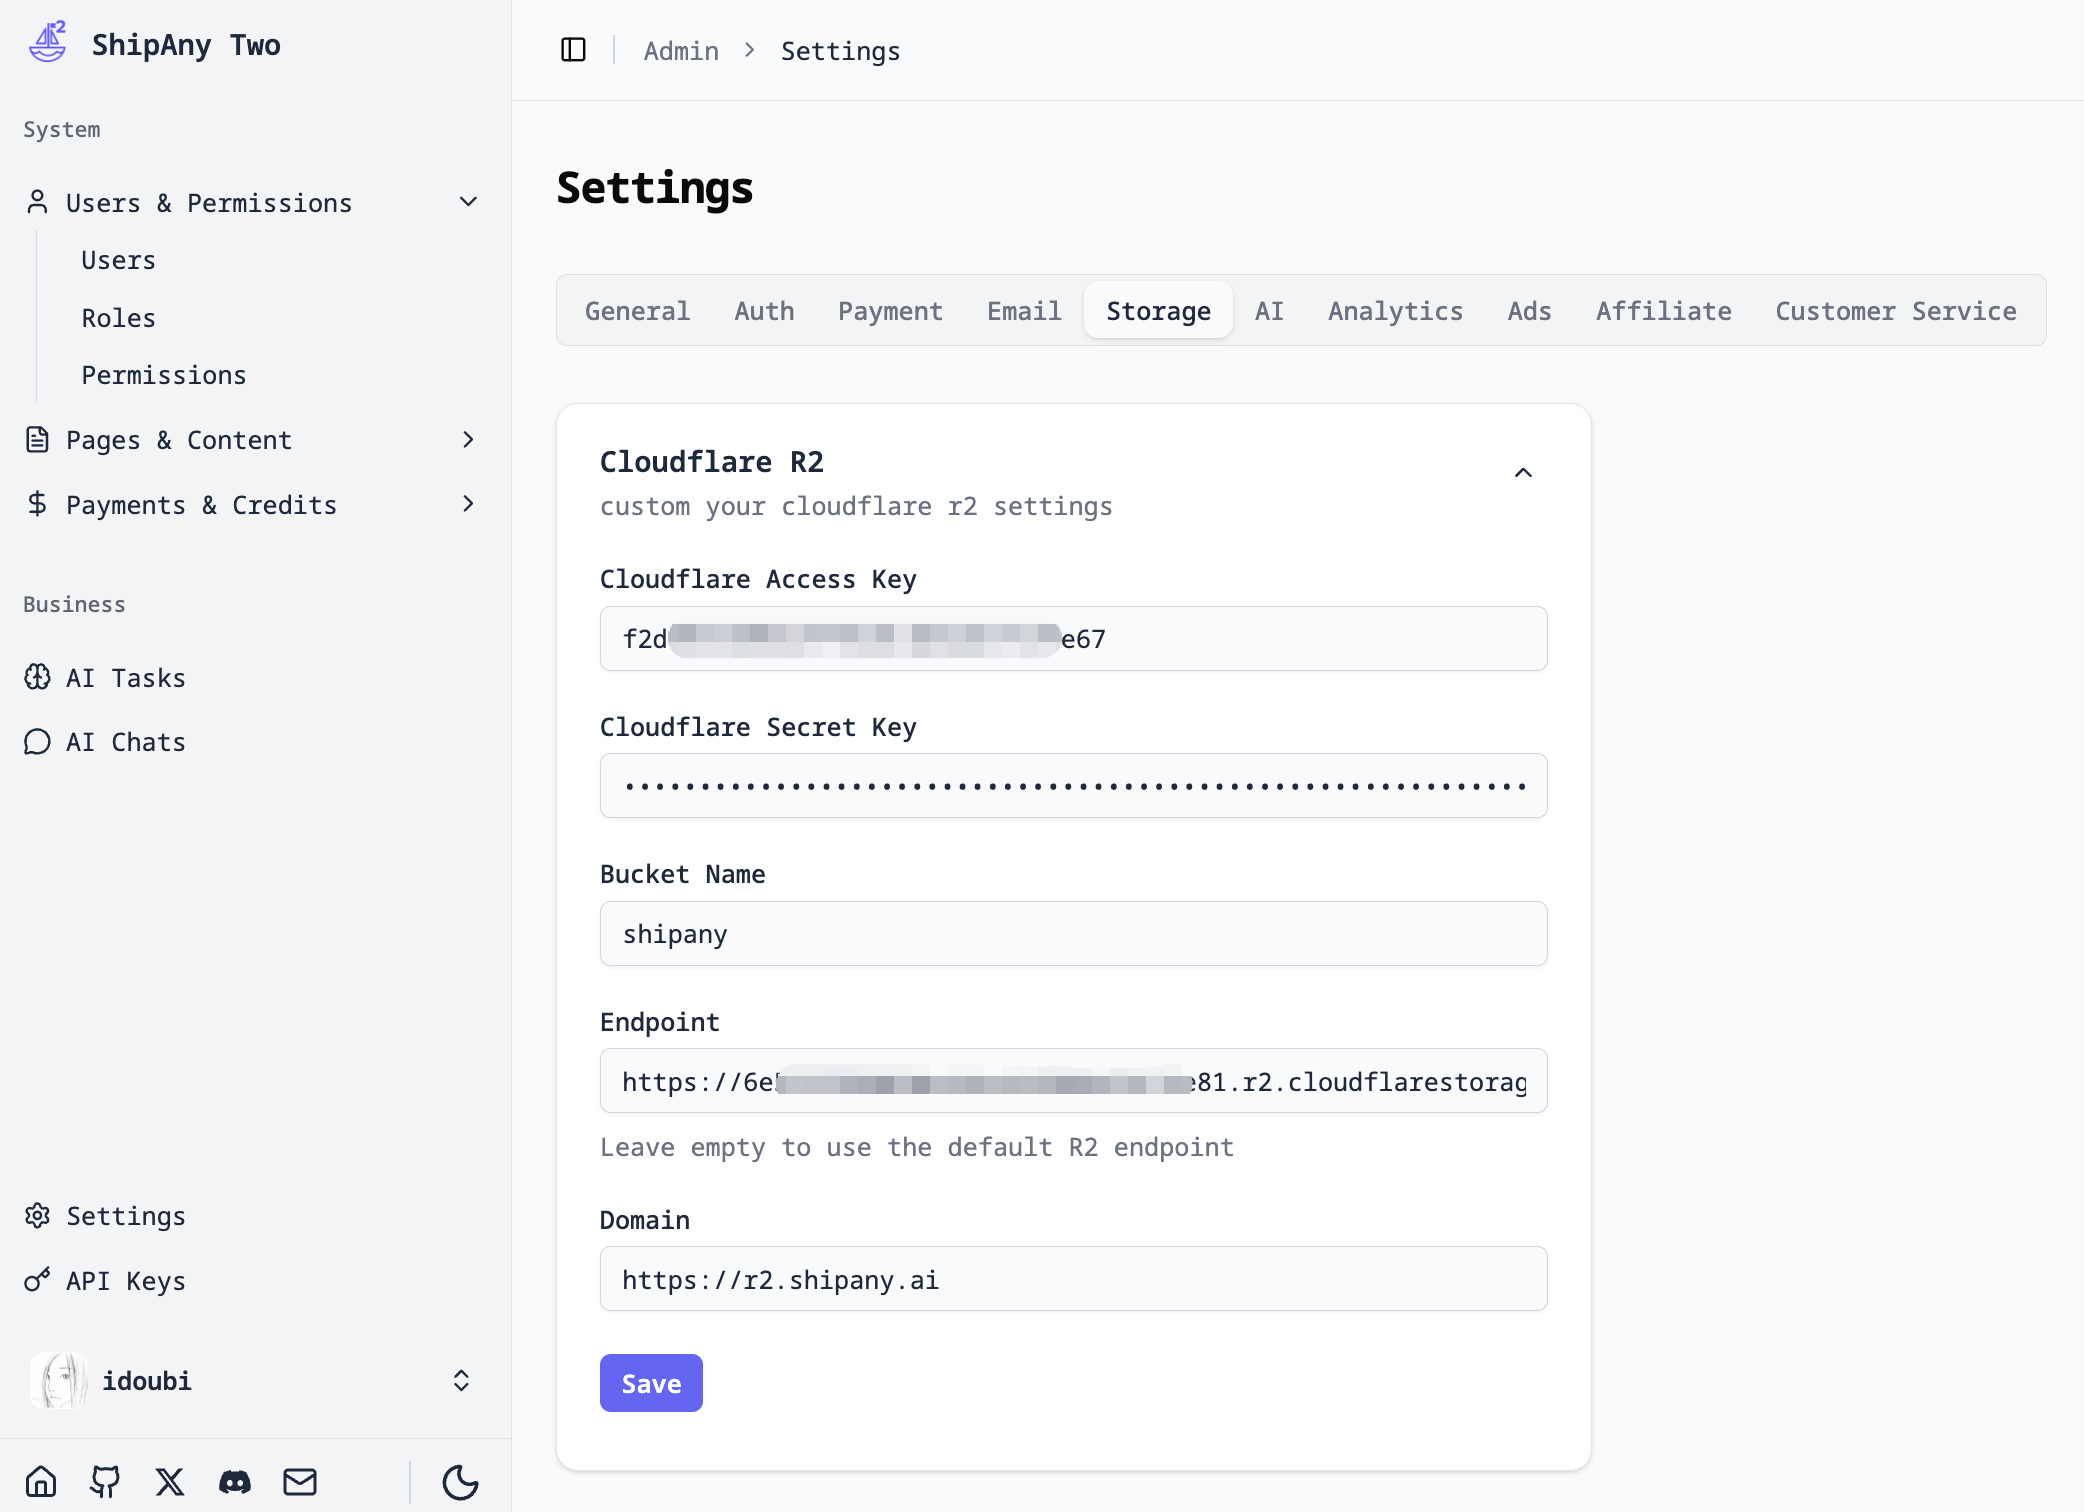
In the project admin panel, navigate to the Settings -> Storage -> Cloudflare R2 panel, fill in the Cloudflare R2 bucket configuration, and click the Save button to save the configuration.
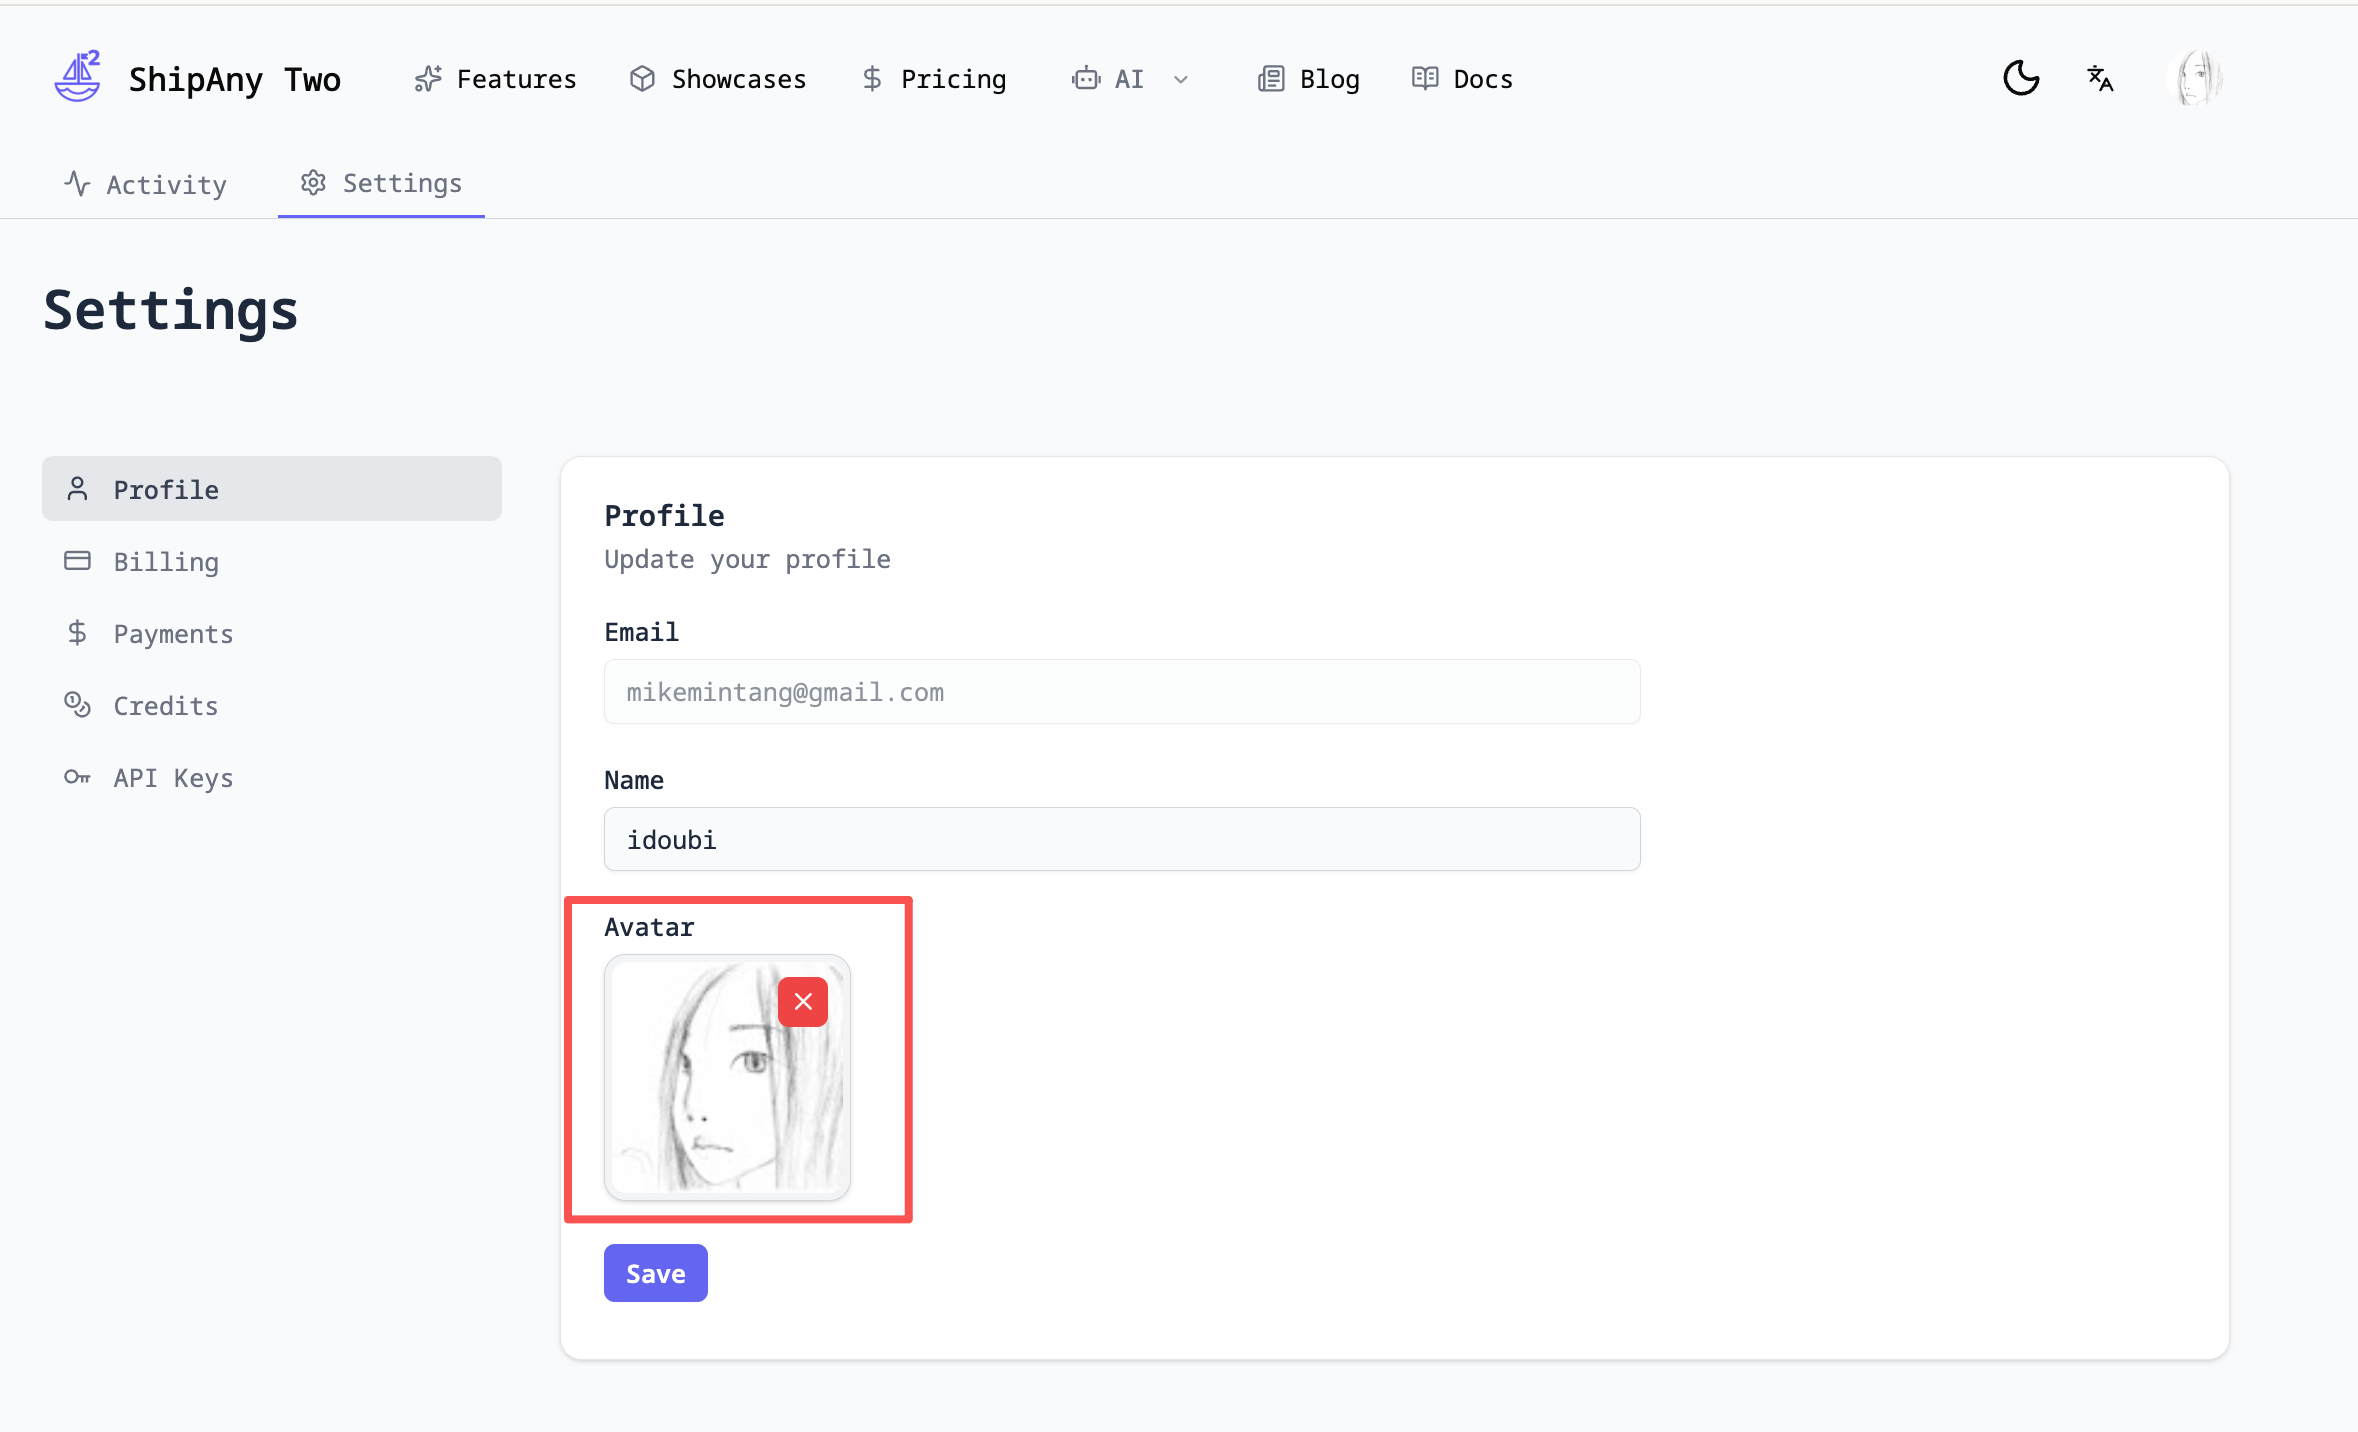
Go to the /settings/profile page of your project, click to upload an avatar. If the image uploads successfully, right-click and select Open image in new tab. If the image access URL matches the custom domain configured in your bucket, it means the Cloudflare R2 storage configuration is successful.