Creem
ShipAny integrates Creem as a payment service provider. With a simple configuration, you can start using it.
Integrate Creem Payment
Follow these steps to integrate Creem payment for your project.
Sign in to the Creem dashboard and create a merchant.
In the Creem dashboard, go to Developers to view or regenerate your API Key.
You can toggle
Test modein the upper-right corner of the Creem dashboard (next to theDevelopersbutton) to enter the sandbox environment and create API keys for testing.
Copy the API Key.
Create a corresponding payment product for each pricing plan based on your pricing table configuration.
For example, one monthly plan in your pricing config might look like:
{
"title": "Standard",
"description": "Ship Fast with your SaaS Startups.",
"interval": "month",
"amount": 16900,
"currency": "USD",
"price": "$169",
"unit": "/ month",
"product_id": "standard-monthly",
"product_name": "ShipAny Boilerplate Standard Monthly",
"group": "monthly"
// ...
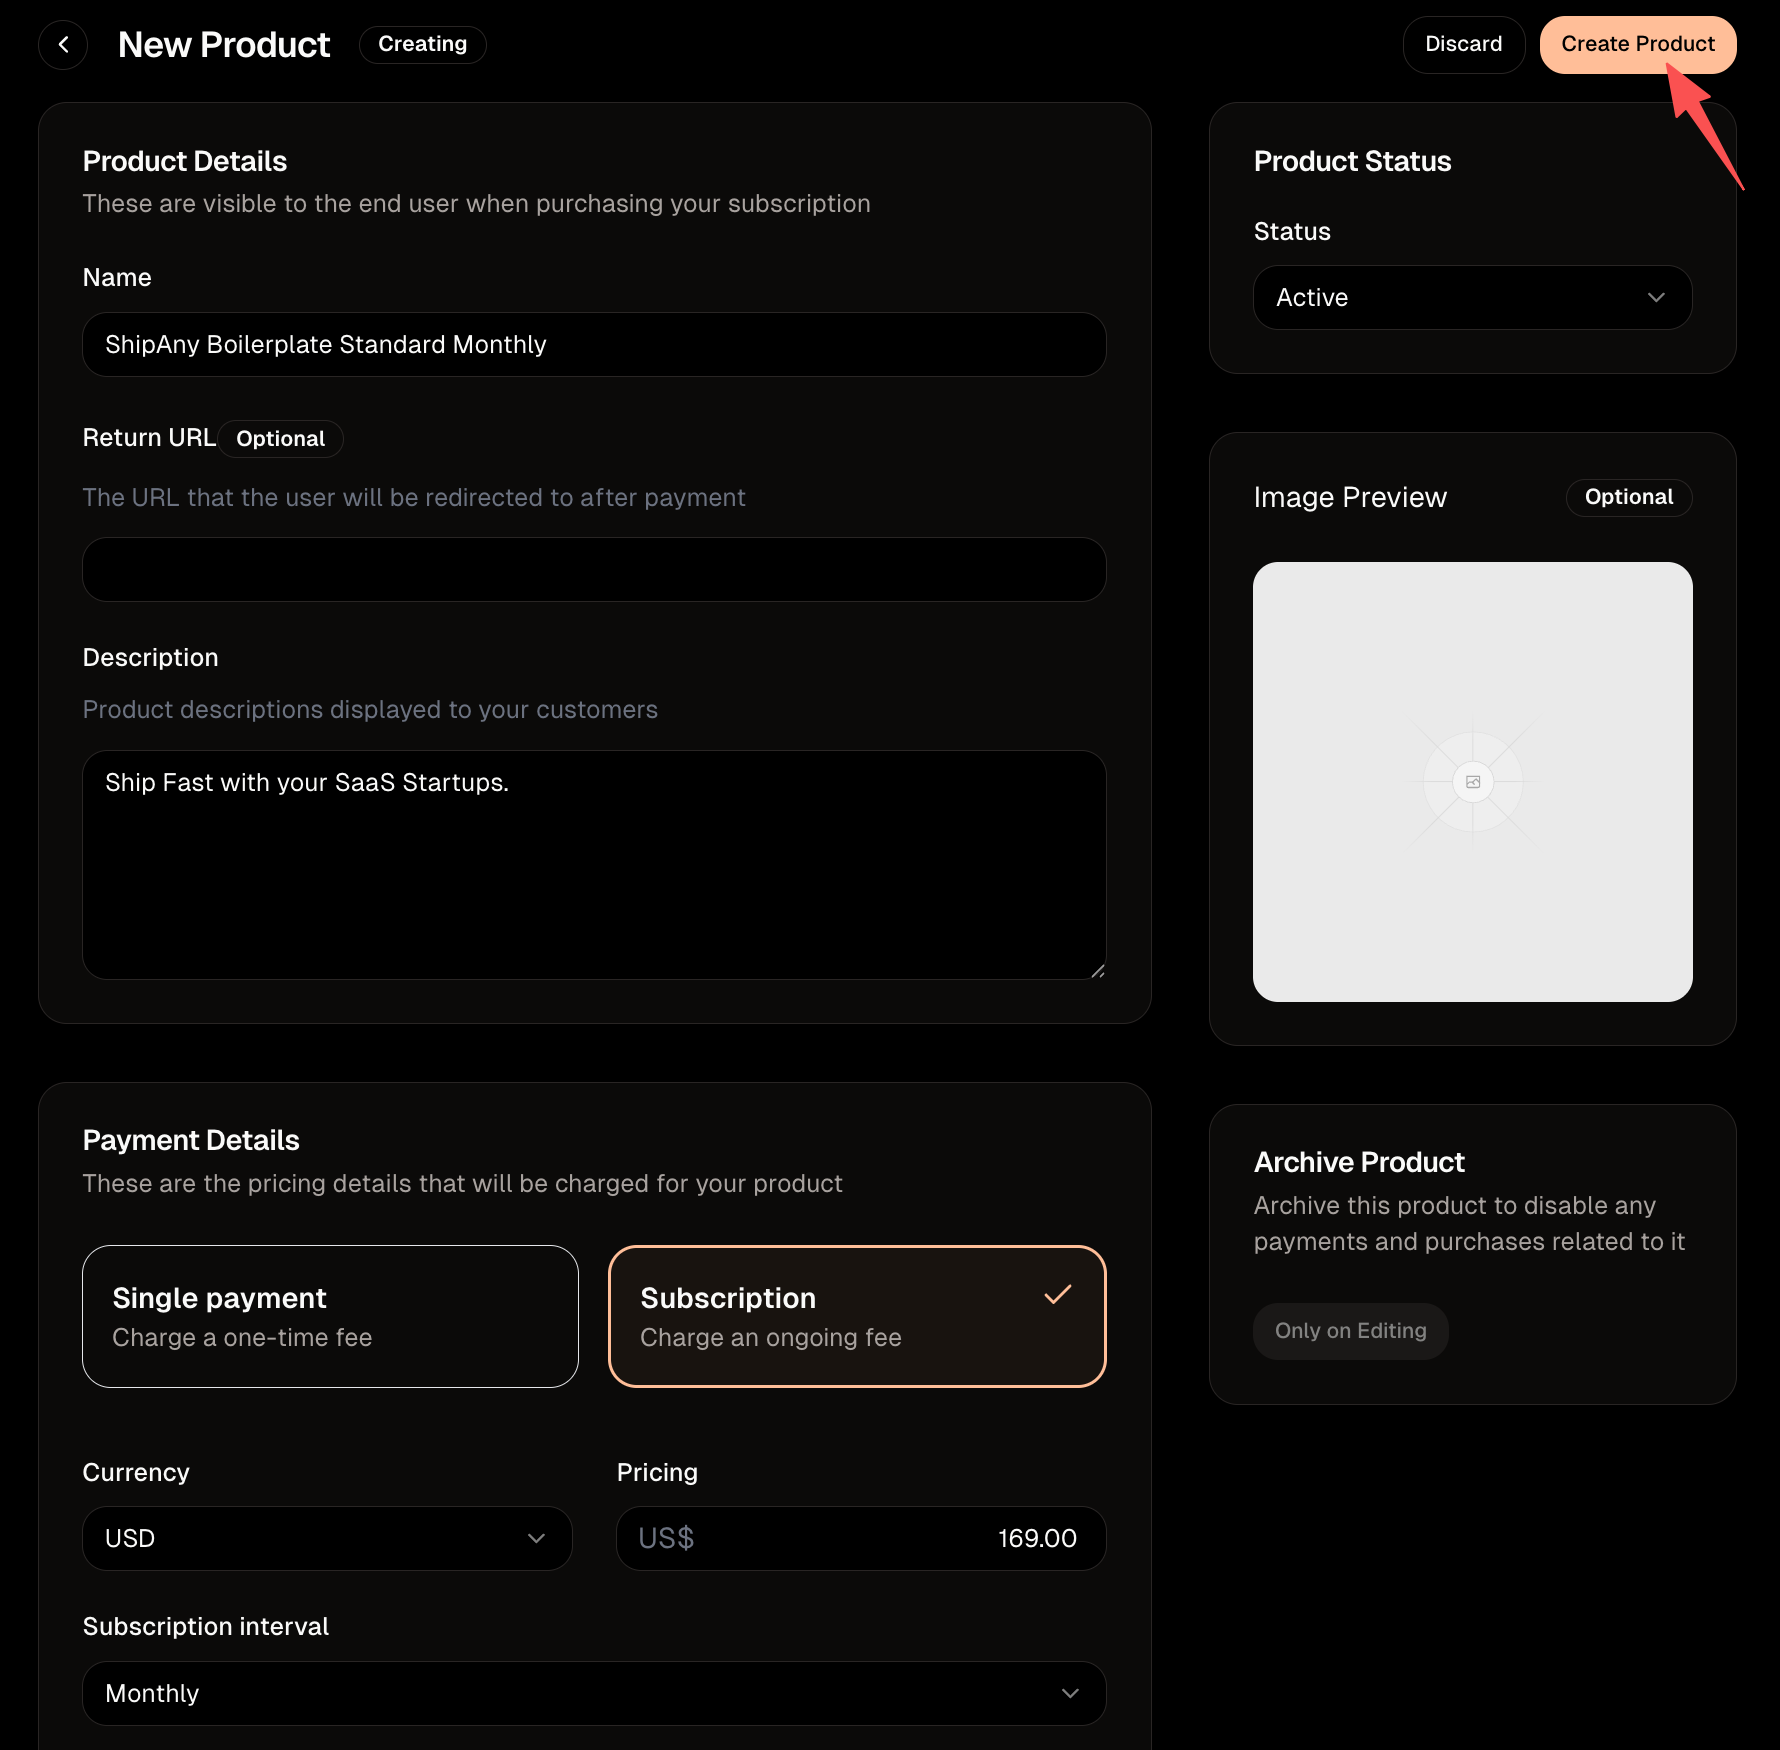
}In the Creem dashboard, go to Products and click Create Product.
Name: Product name. Map this to the plan’sproduct_name(you can tweak it if you want).Return URL: Redirect URL after successful payment. You can leave this blank.Description: Product description. Map this to the plan’sdescription(you can tweak it if you want).
Under Payment Details, Currency / Pricing / Subscription interval must match the plan’s currency / amount / interval.
After filling out the product info, click Create Product.
On the Products page, find the product you just created, open the right-side dropdown menu, click Copy Product ID, and copy the product ID.
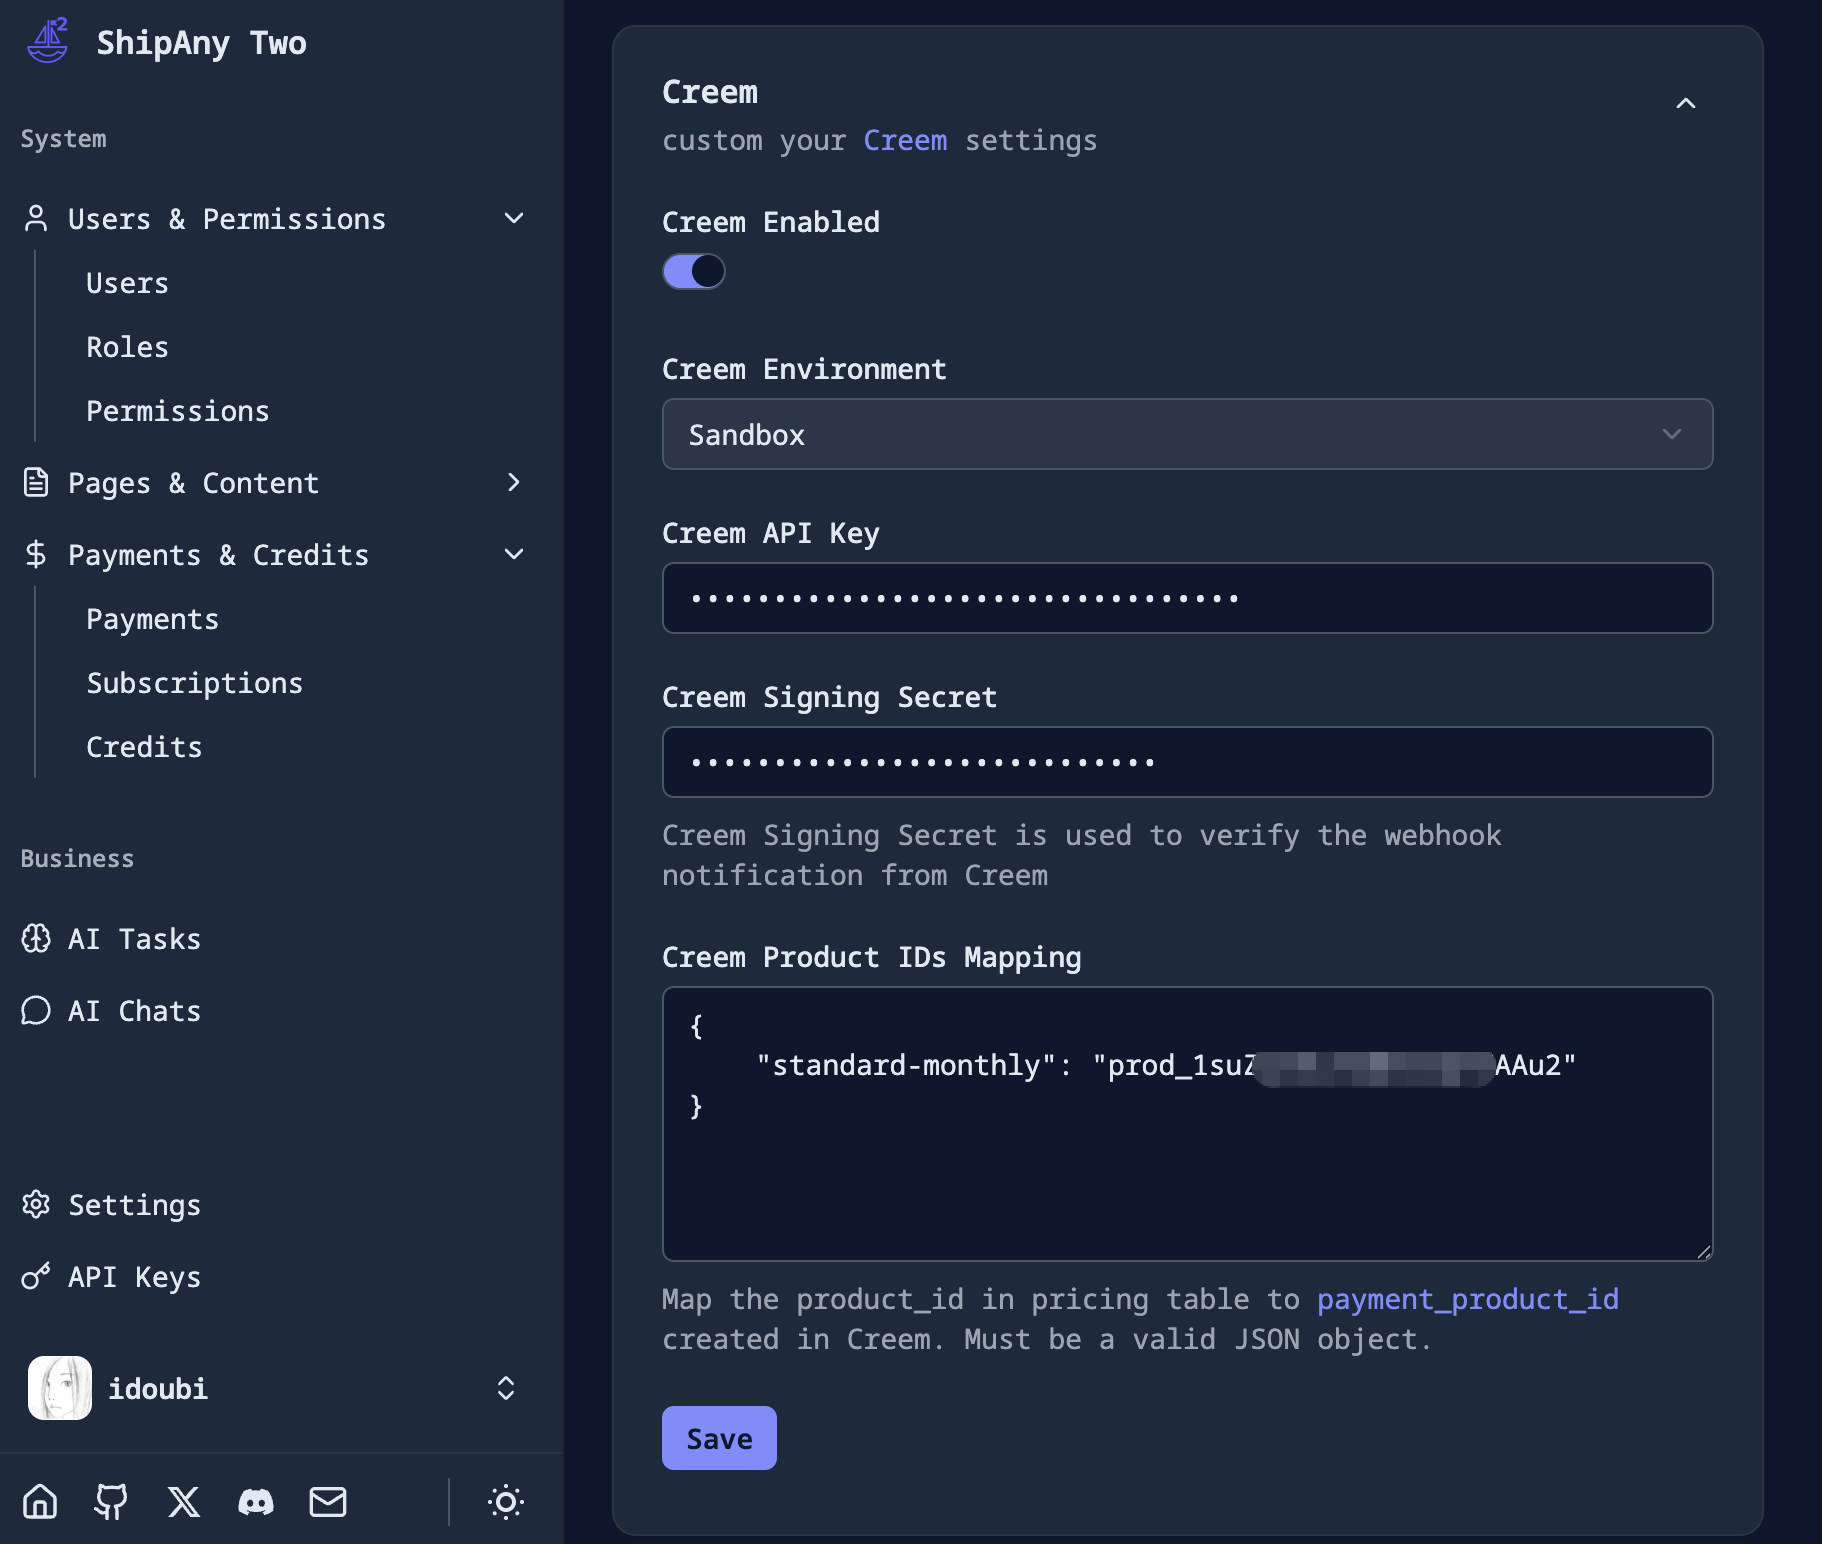
In the project admin dashboard, go to Settings -> Payment -> Creem, and paste the API Key from Step 2 into Creem API Key.
In Creem Product IDs Mapping, fill in the mapping from your pricing plan product_id (Step 3) to the Creem product ID.
{
  "standard-monthly": "prod_xxx"
}
Creem Enabled: Toggle to enable Creem payment.Creem Environment: Creem environment. For local testing, chooseSandbox(corresponds to Creem’s Test Mode). For production, chooseProduction.Creem Signing Secret: Signing secret for verifying payment notifications. You can leave it blank for now and fill it in after setting up webhooks later.
Click Save to persist the Creem payment configuration.
In the project admin dashboard, go to Settings -> Payment -> Basic Payment and enable Select Payment Method Enabled so users can choose a payment method. Alternatively, set Default Payment Provider to Creem to use Creem by default.
Visit your project’s /pricing page, pick a plan, and click the Creem checkout button.
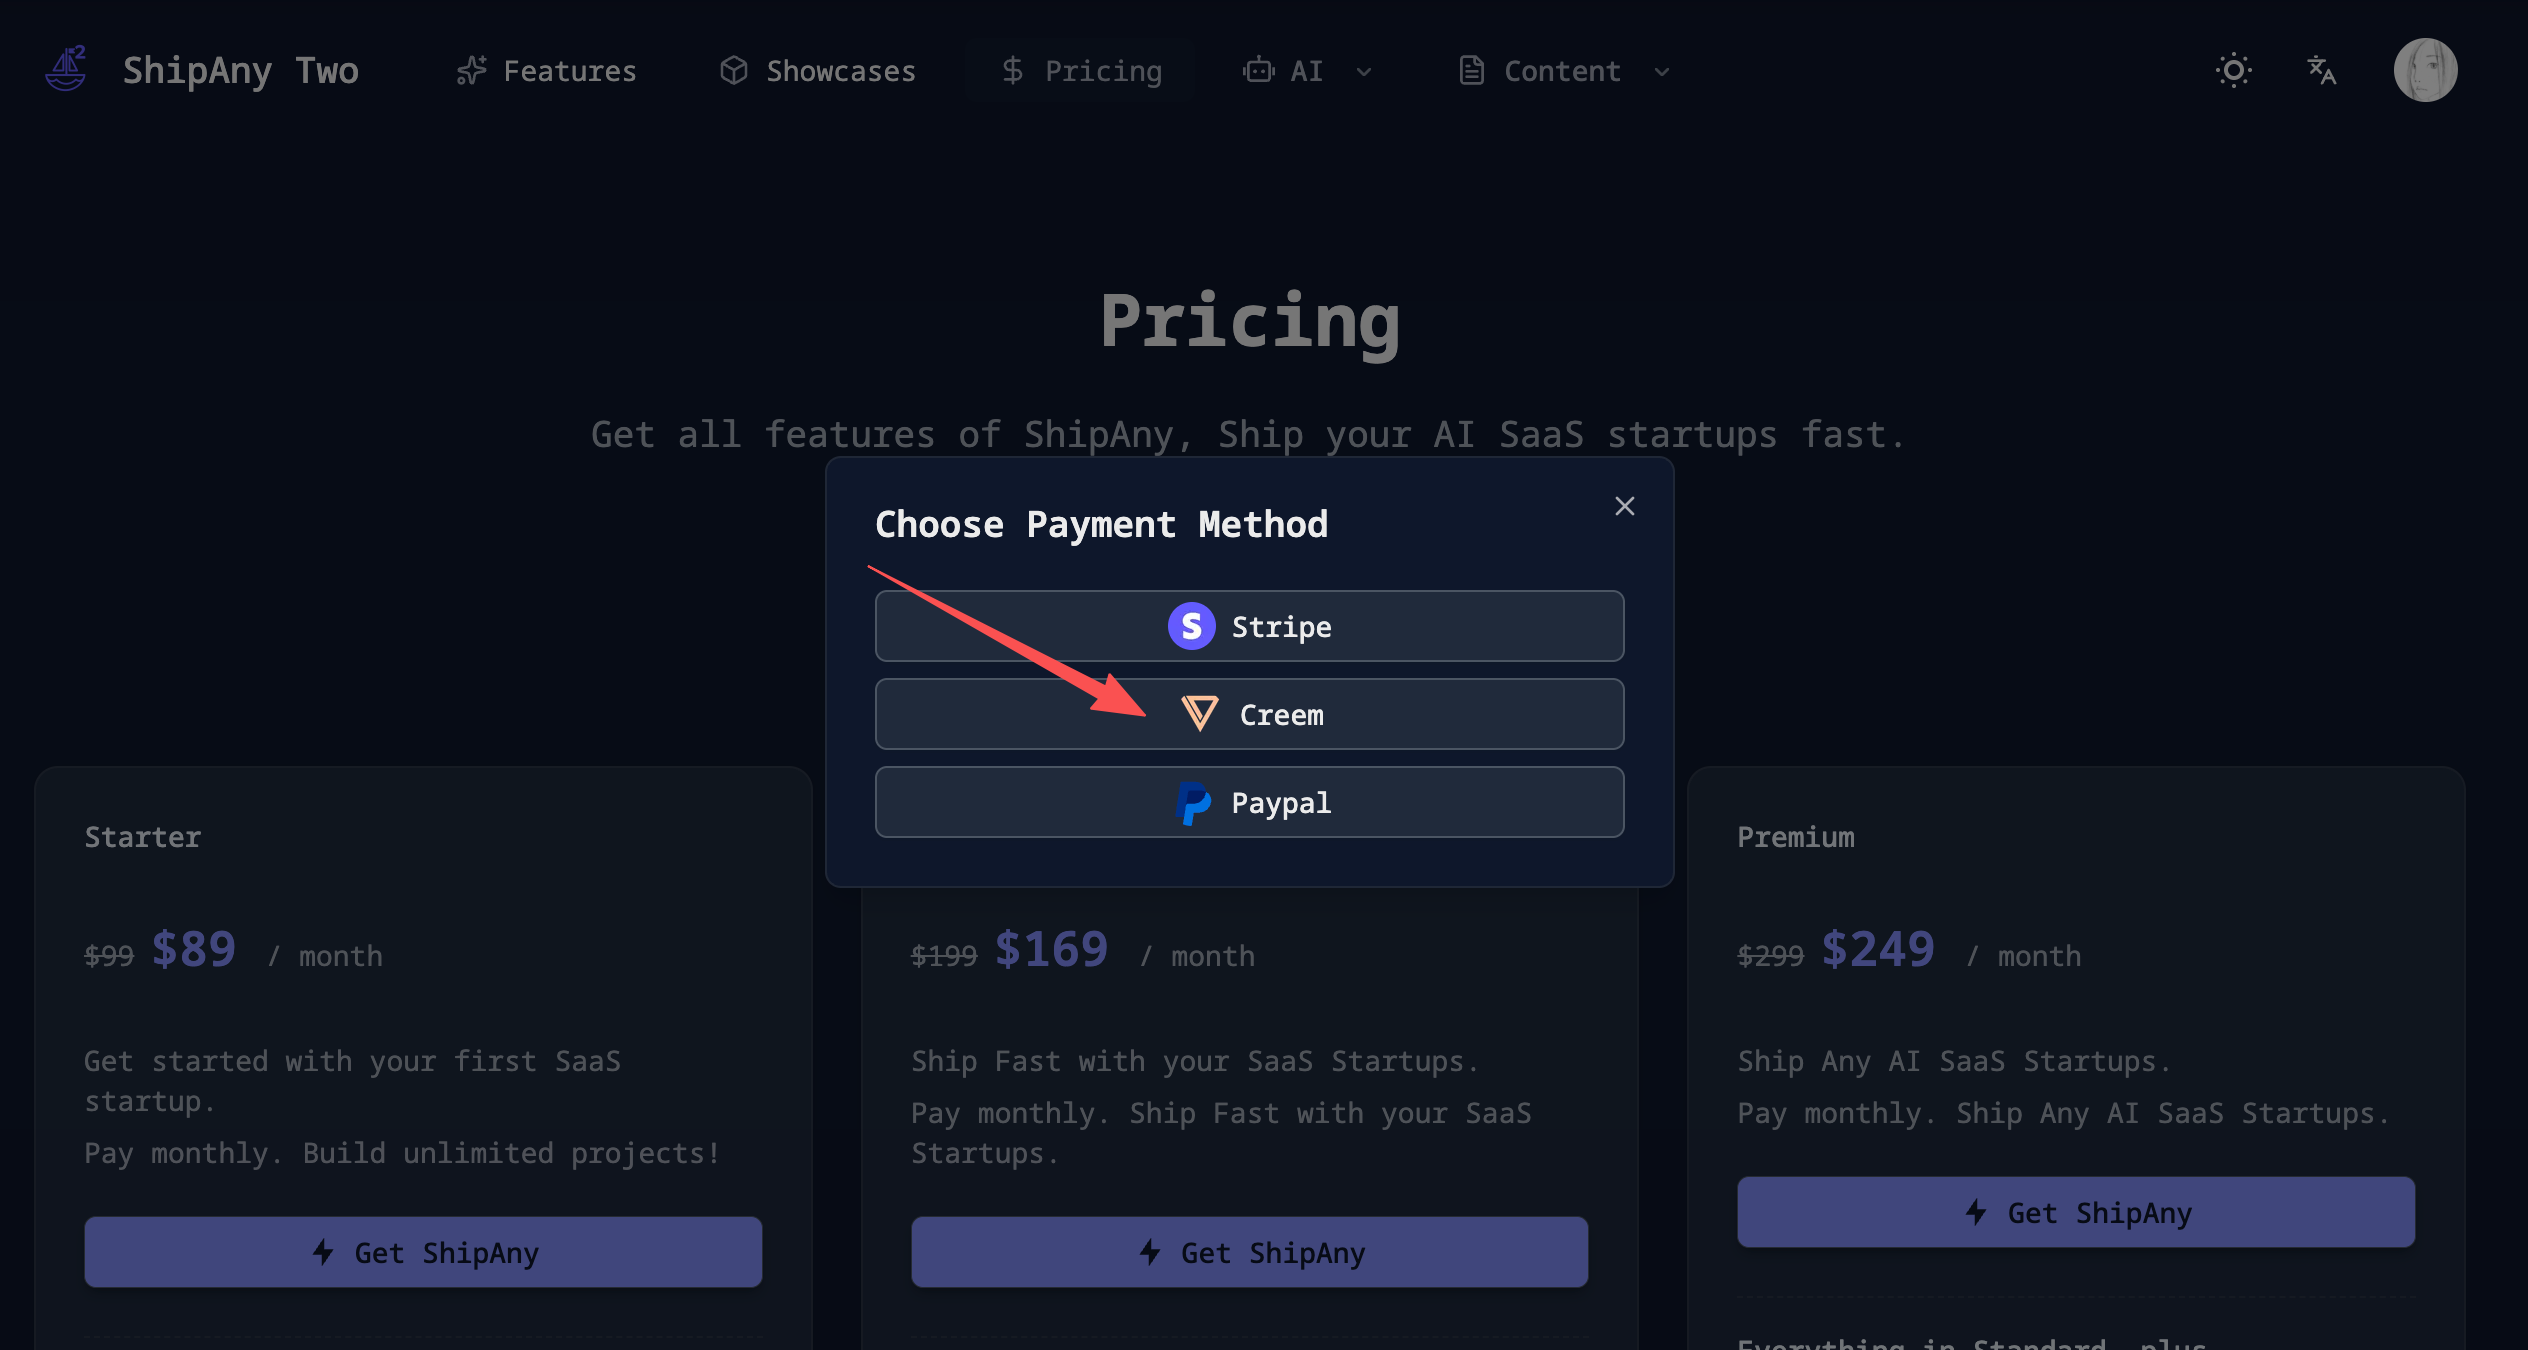
If you are redirected to the Creem payment page successfully, the integration is working.
If you’re using a test API key, you can use a Creem test card to verify the payment flow.
Design Pricing Table
The default pricing table configuration lives in src/config/locale/messages/{locale}/pages/pricing.json. It supports multiple languages; each locale has its own pricing configuration.
Your pricing table is independent of the payment provider. When integrating Creem, you can follow Stripe’s guide for pricing design: Design Pricing Table.
Configure Payment Callback
After a user selects a plan on the pricing page and places an order, they will be redirected to the Creem payment page. After payment succeeds, Creem redirects back to your project callback endpoint: /api/payment/callback.
In the callback endpoint, ShipAny updates the order status by order number, then redirects to the configured callbackUrl.
This callbackUrl is set in the checkout endpoint: /api/payment/checkout:
const callbackUrl =
  paymentType === PaymentType.SUBSCRIPTION
    ? `${callbackBaseUrl}/settings/billing`
    : `${callbackBaseUrl}/settings/payments`;
By default, one-time payments redirect to /settings/payments, and subscription payments redirect to /settings/billing.
You can change the post-payment redirect URLs to fit your product flow.
Note: The payment callback is a synchronous redirect. If the user confirms payment on the Creem page but closes the browser before the redirect happens, your callback endpoint won’t be hit, the order status won’t be updated, and the user won’t see the paid order in their account. This is commonly referred to as a
lost order.
To avoid lost order scenarios, it’s recommended to configure payment notifications (webhooks) in the Creem dashboard once you’re running in production.
Configure Payment Notifications
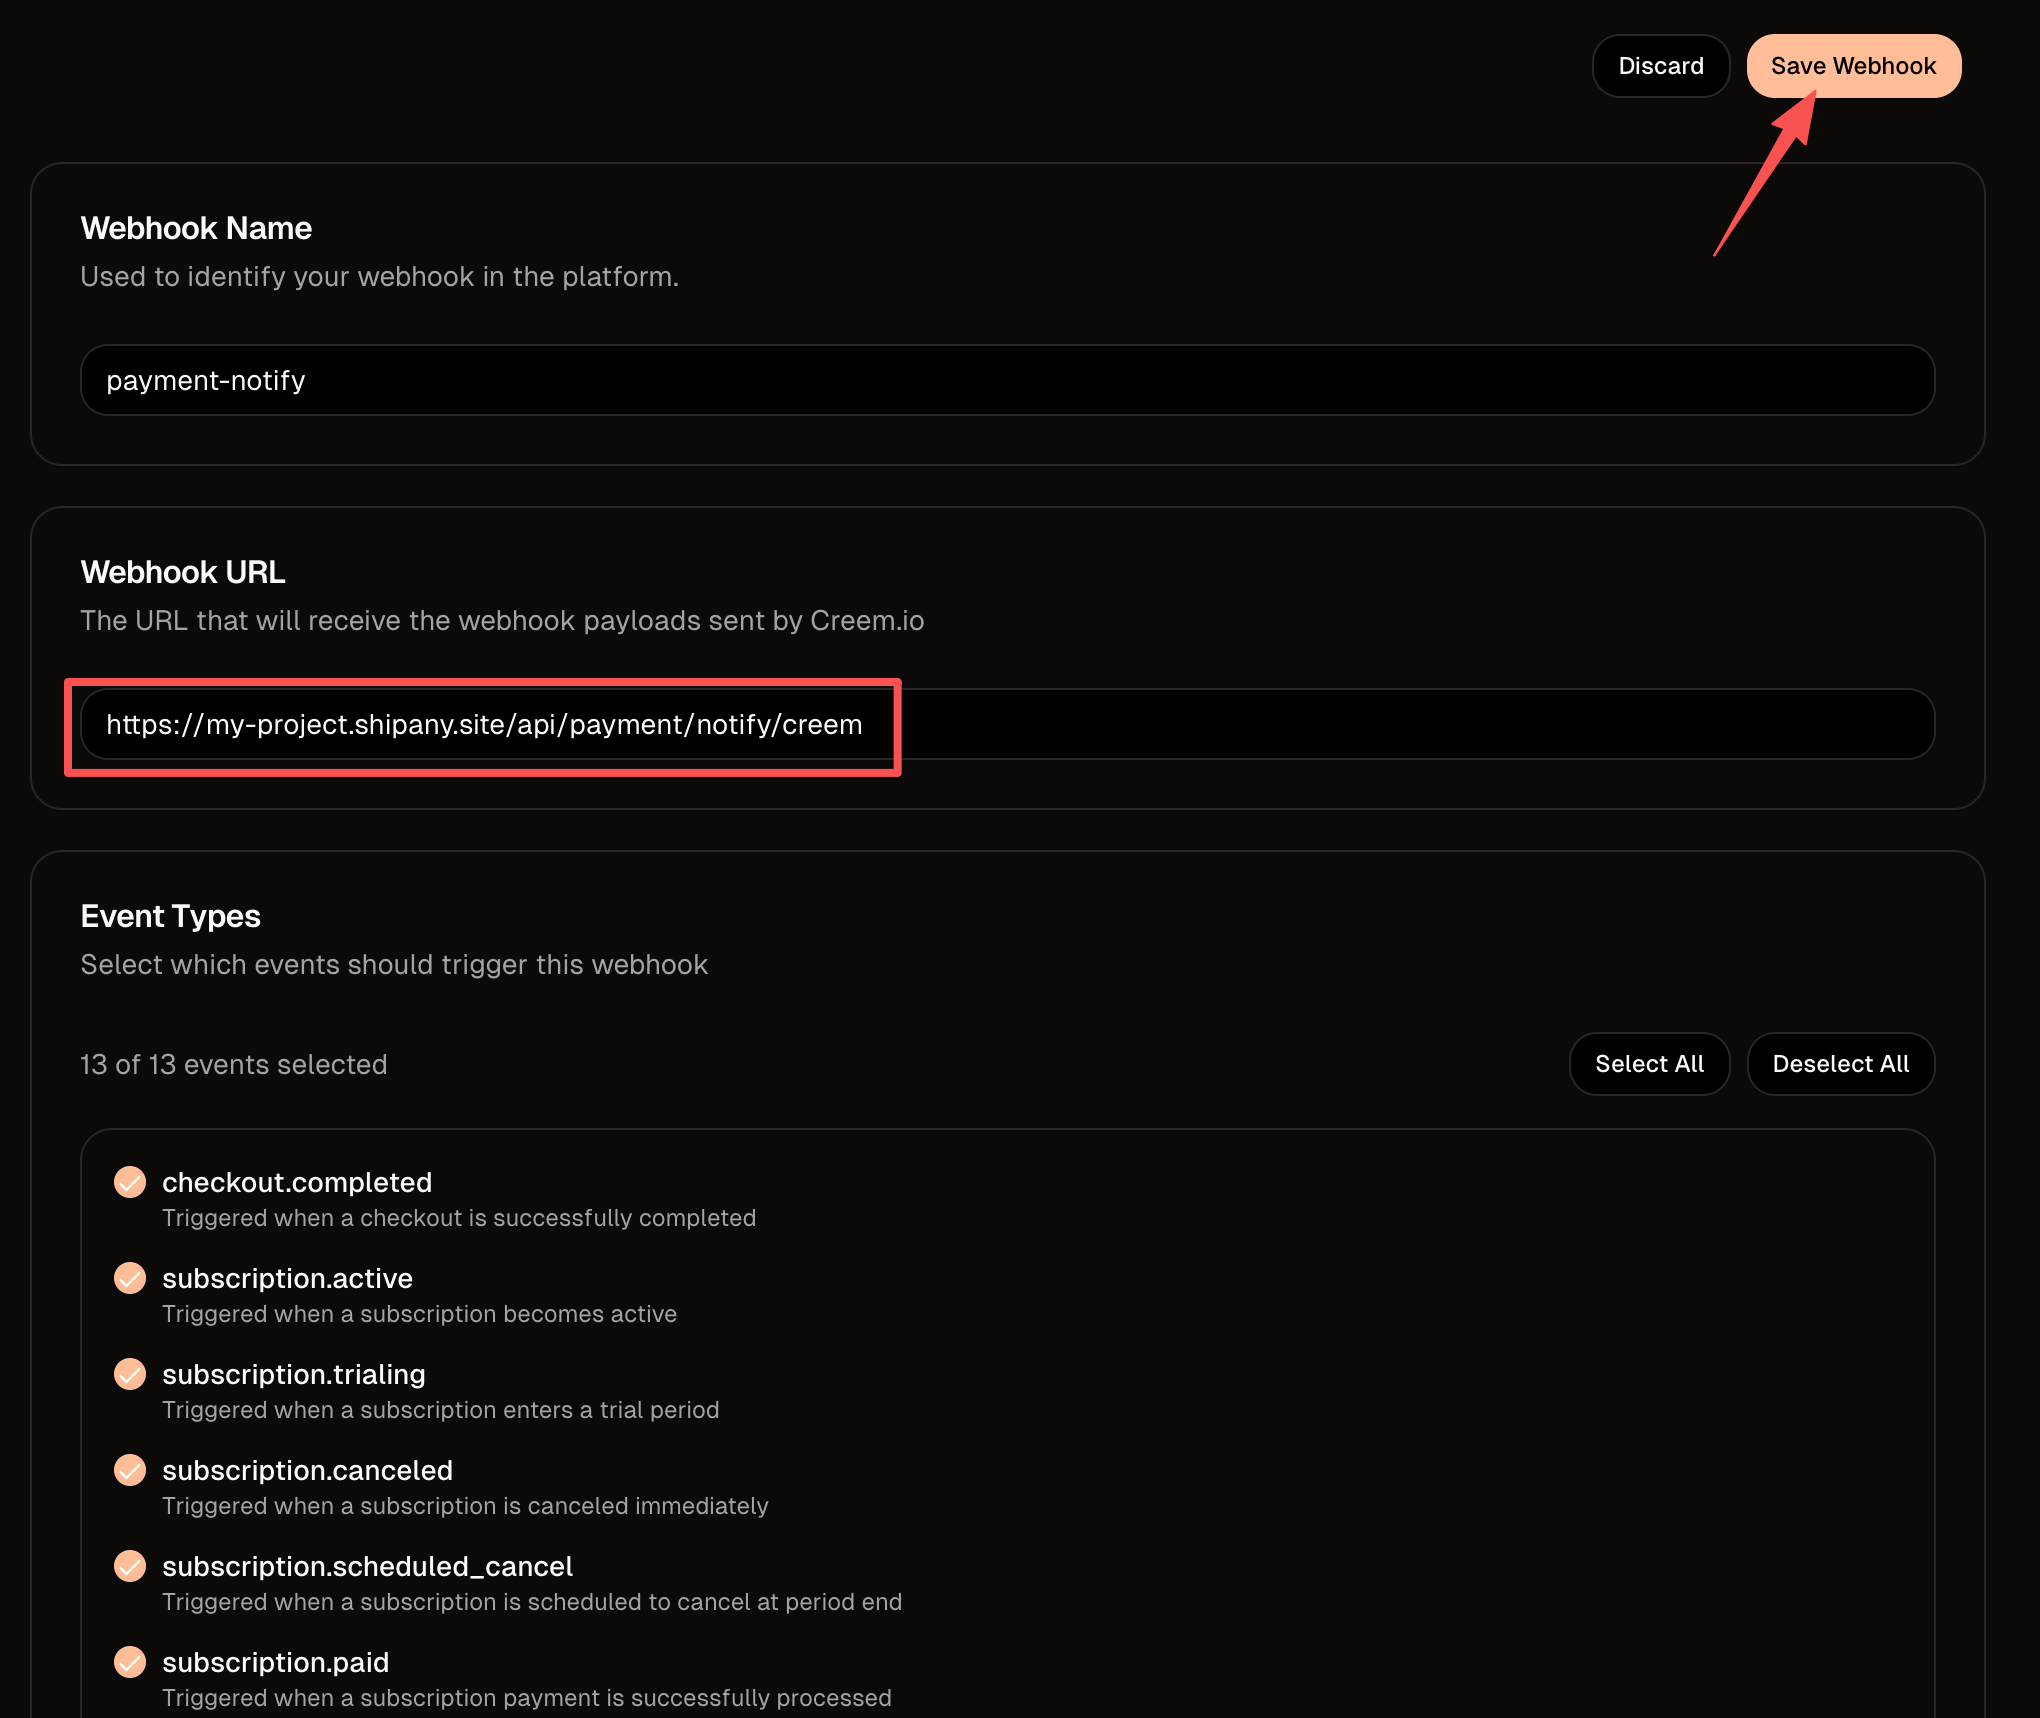
In the Creem merchant dashboard, go to Developers -> Webhooks and click Create webhook.
Webhook Name: A name for your own reference.Webhook URL: The endpoint that receives notifications. It must be a publicly accessiblehttpsURL, in the format:
https://{your-domain.com}/api/payment/notify/creemReplace {your-domain.com} with your project domain name (root domain or subdomain).
Event Types: ClickSelect Allto subscribe to all events.
Or, select only a subset. ShipAny can handle the following notification event types:
# Checkout completed
checkout.completed
# Payment succeeded
subscription.paid
# Subscription updated
subscription.update
# Subscription paused
subscription.paused
# Subscription activated
subscription.active
# Subscription canceled
subscription.canceled
After completing the configuration, click Save Webhook.
After creating the webhook endpoint, open its details page and click the copy icon under Signing secret to copy the signing secret (it starts with whsec_).
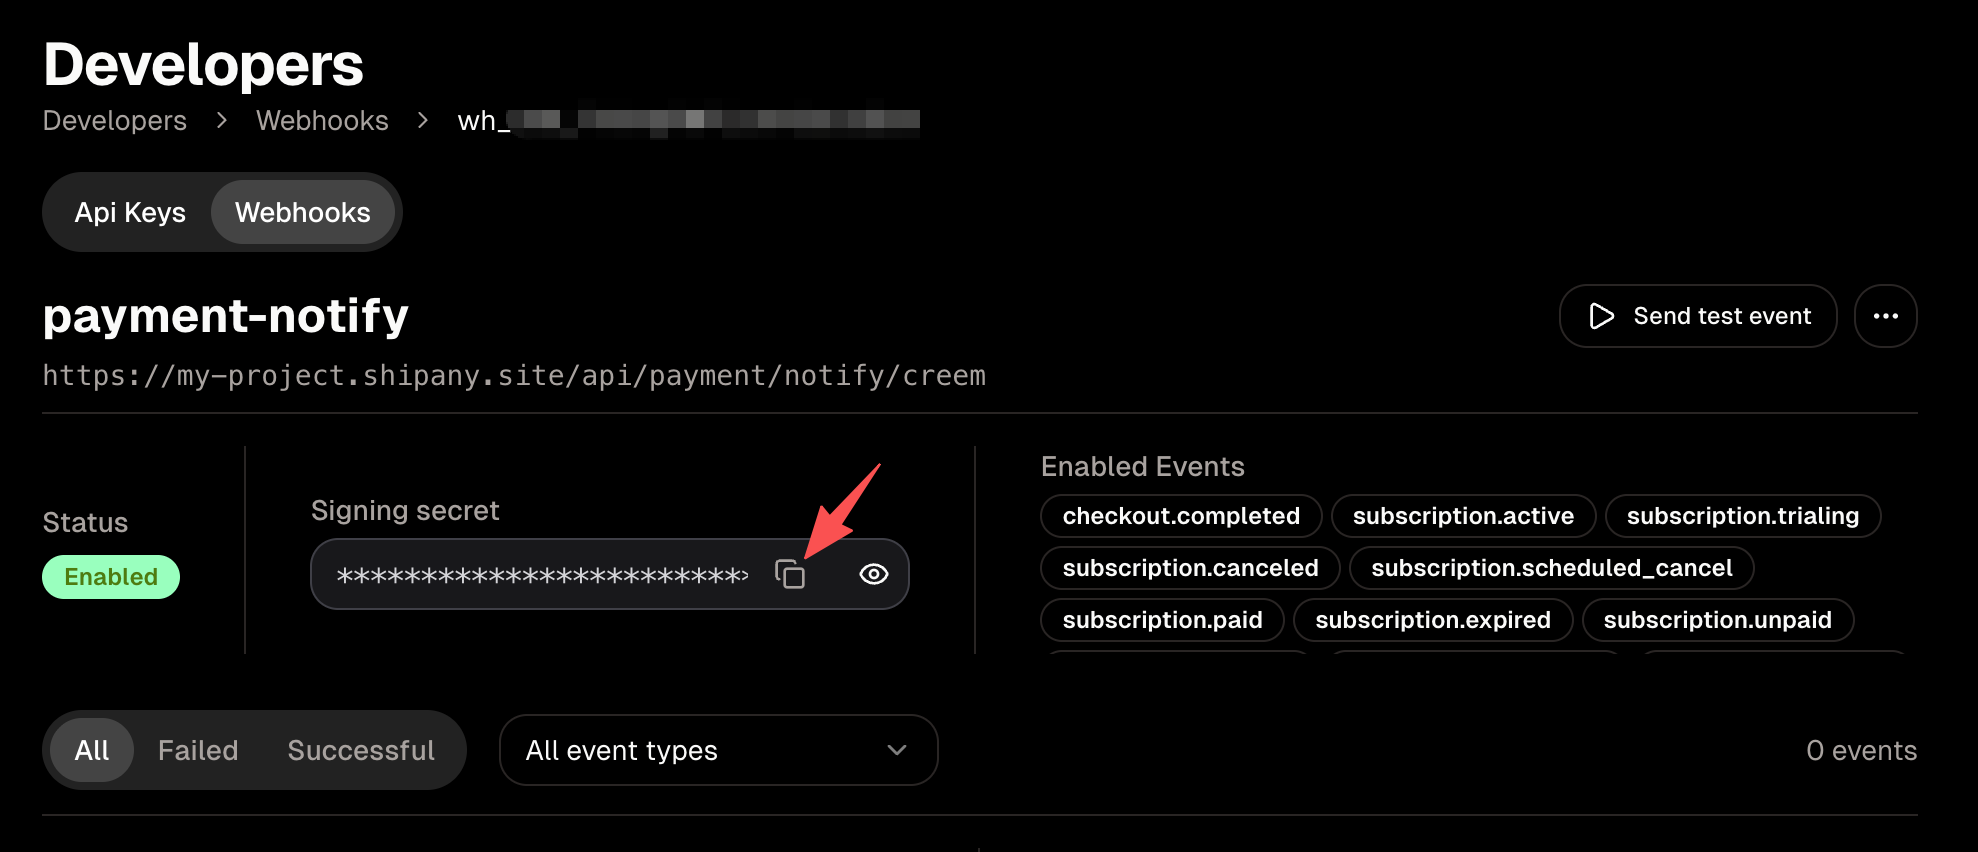
In the project admin dashboard, go to Settings -> Payment -> Creem and paste the signing secret into Creem Signing Secret.
Local Debugging of Payment Notification
Across payment providers, the local debugging workflow for webhooks is generally the same: use intranet penetration (a tunneling tool) to map a public URL to your local dev machine, then configure that public URL as the webhook endpoint in the provider dashboard.
For example, after setting up ngrok, your Creem webhook URL might look like:
https://xxx.ngrok-free.app/api/payment/notify/creemFor step-by-step instructions, see Stripe’s guide: Local Debugging of Payment Notification.