Paypal
ShipAny integrates PayPal as a payment service provider. You can get started with simple configuration.
Integrate PayPal Payment
Follow the steps below to integrate PayPal payment into your project.
Follow the PayPal Business Account Setup Guide to set up a PayPal business account.
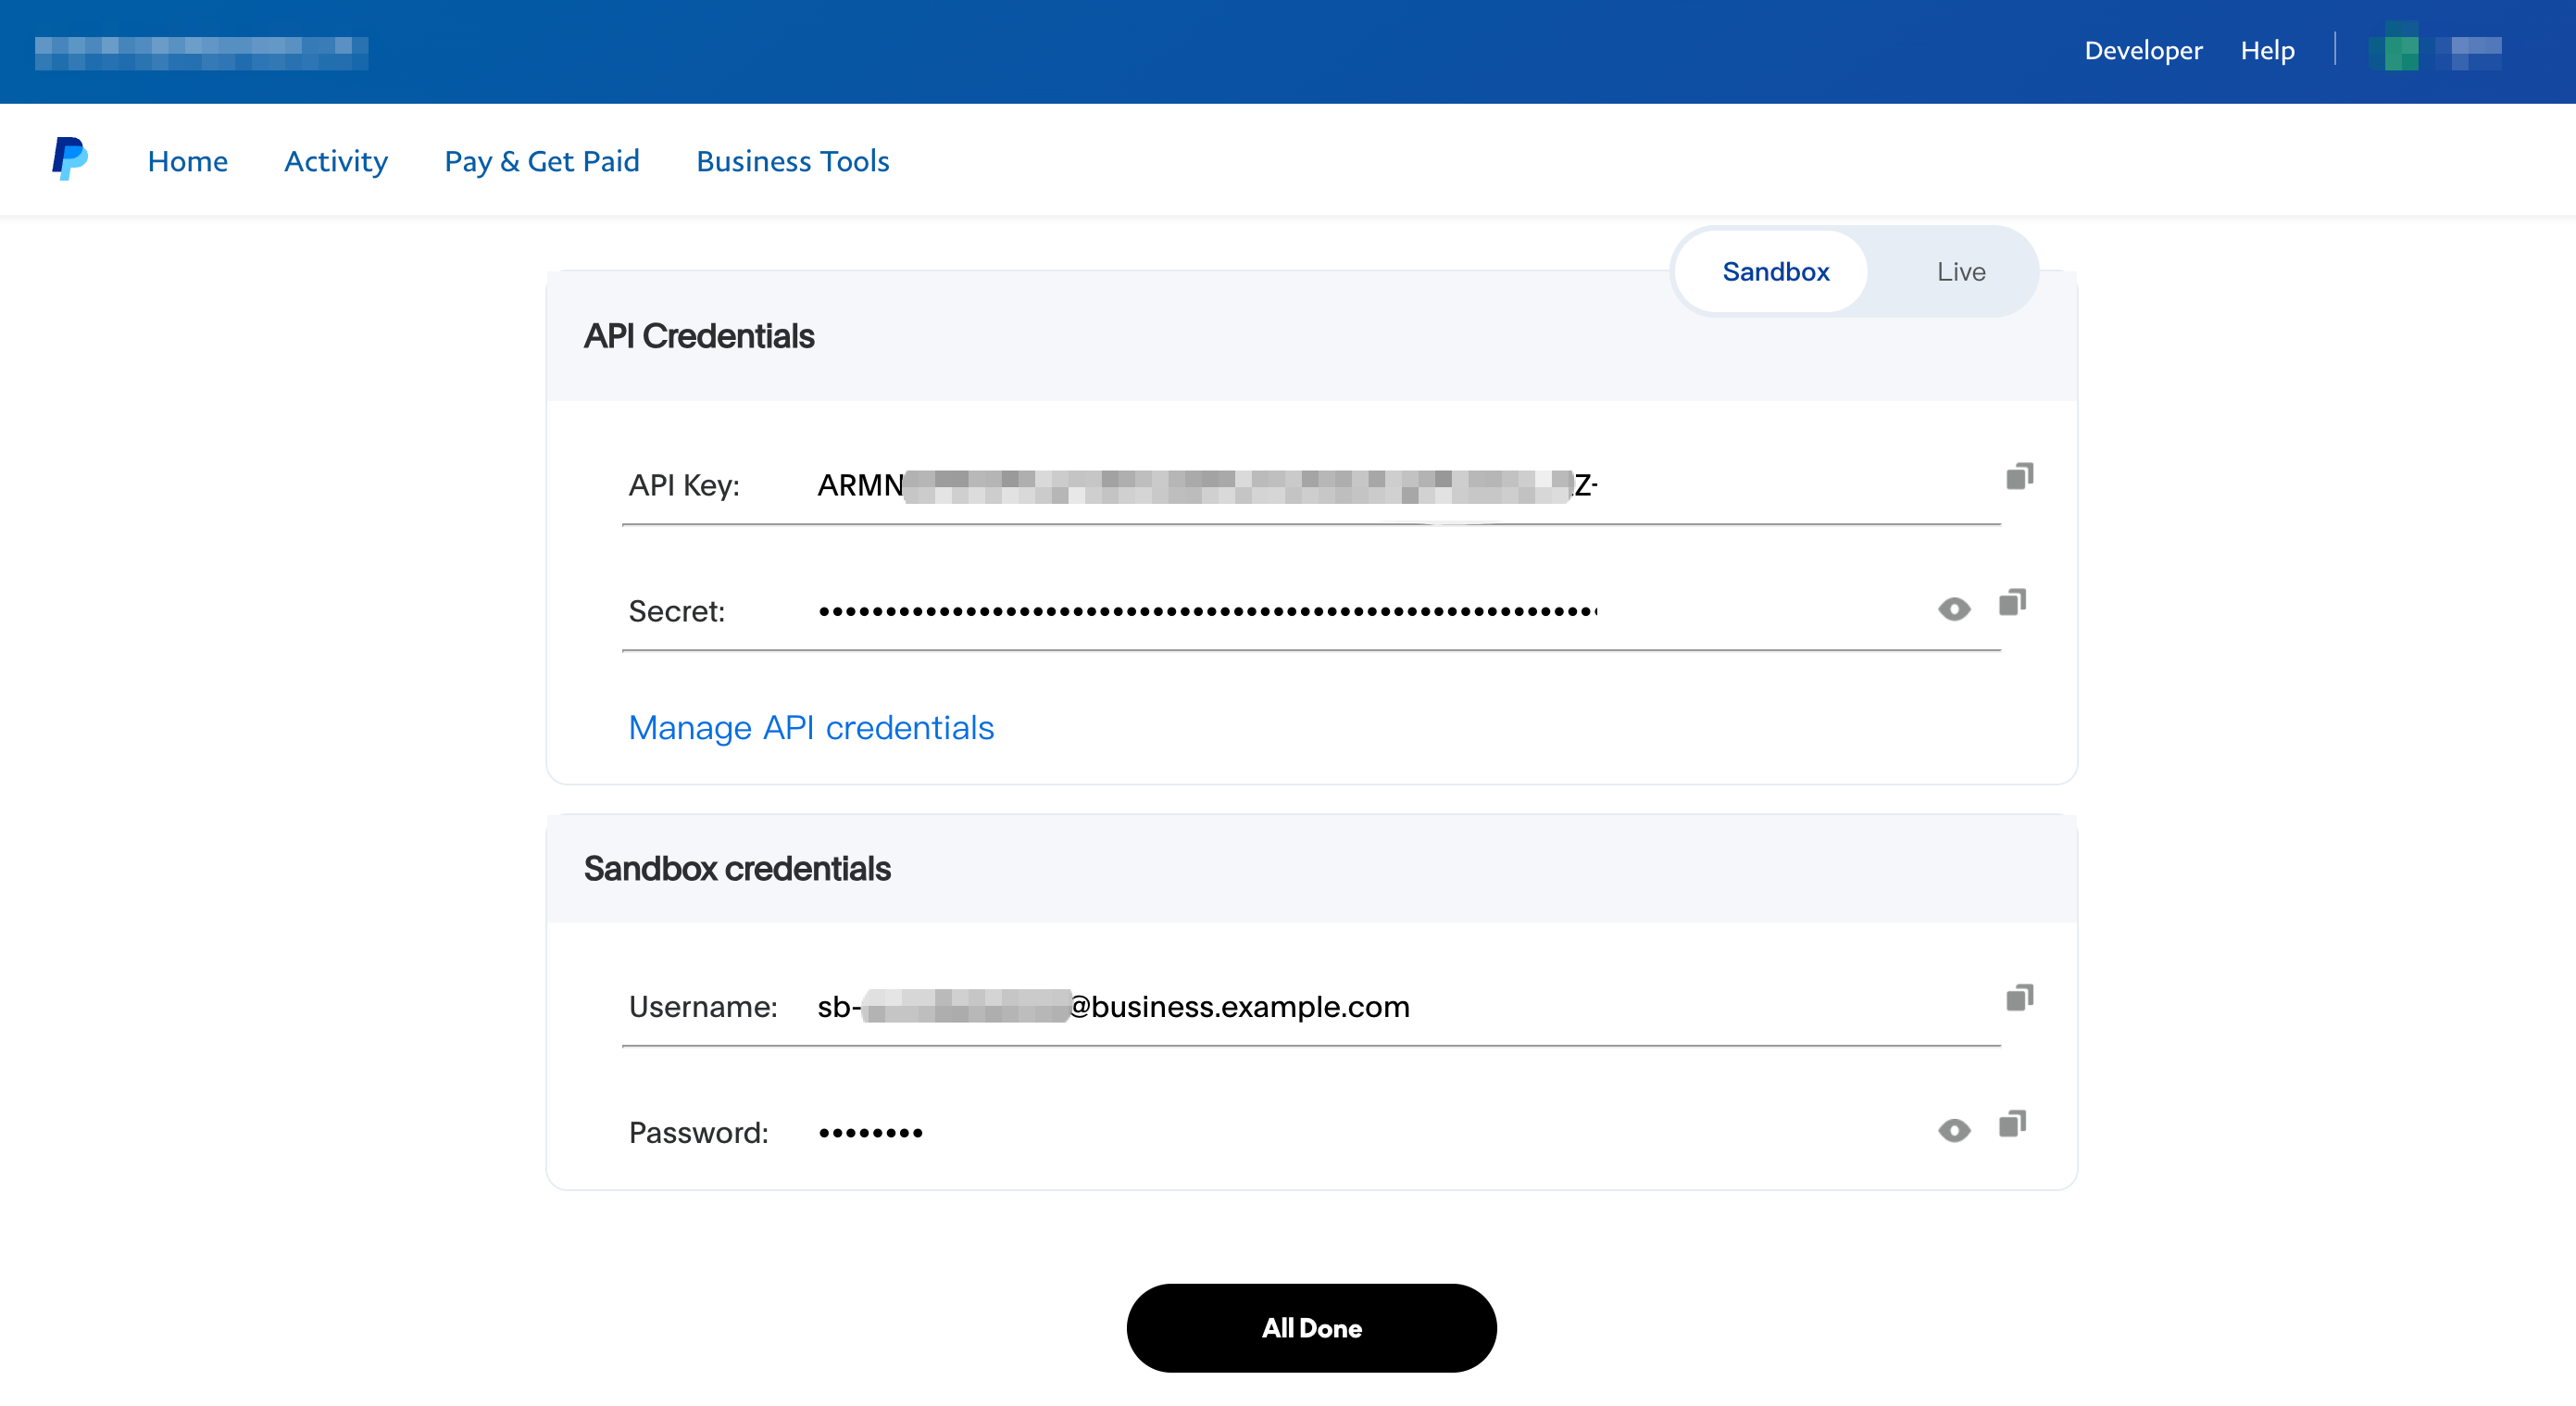
Log in to the PayPal Merchant Dashboard with your PayPal business account credentials to view your payment credentials.
The API Key and Secret under API Credentials are your PayPal payment API credentials.
The Username and Password under Sandbox credentials are your PayPal sandbox account credentials.
For local testing, switch to the Sandbox environment. For production, switch to the Live environment.
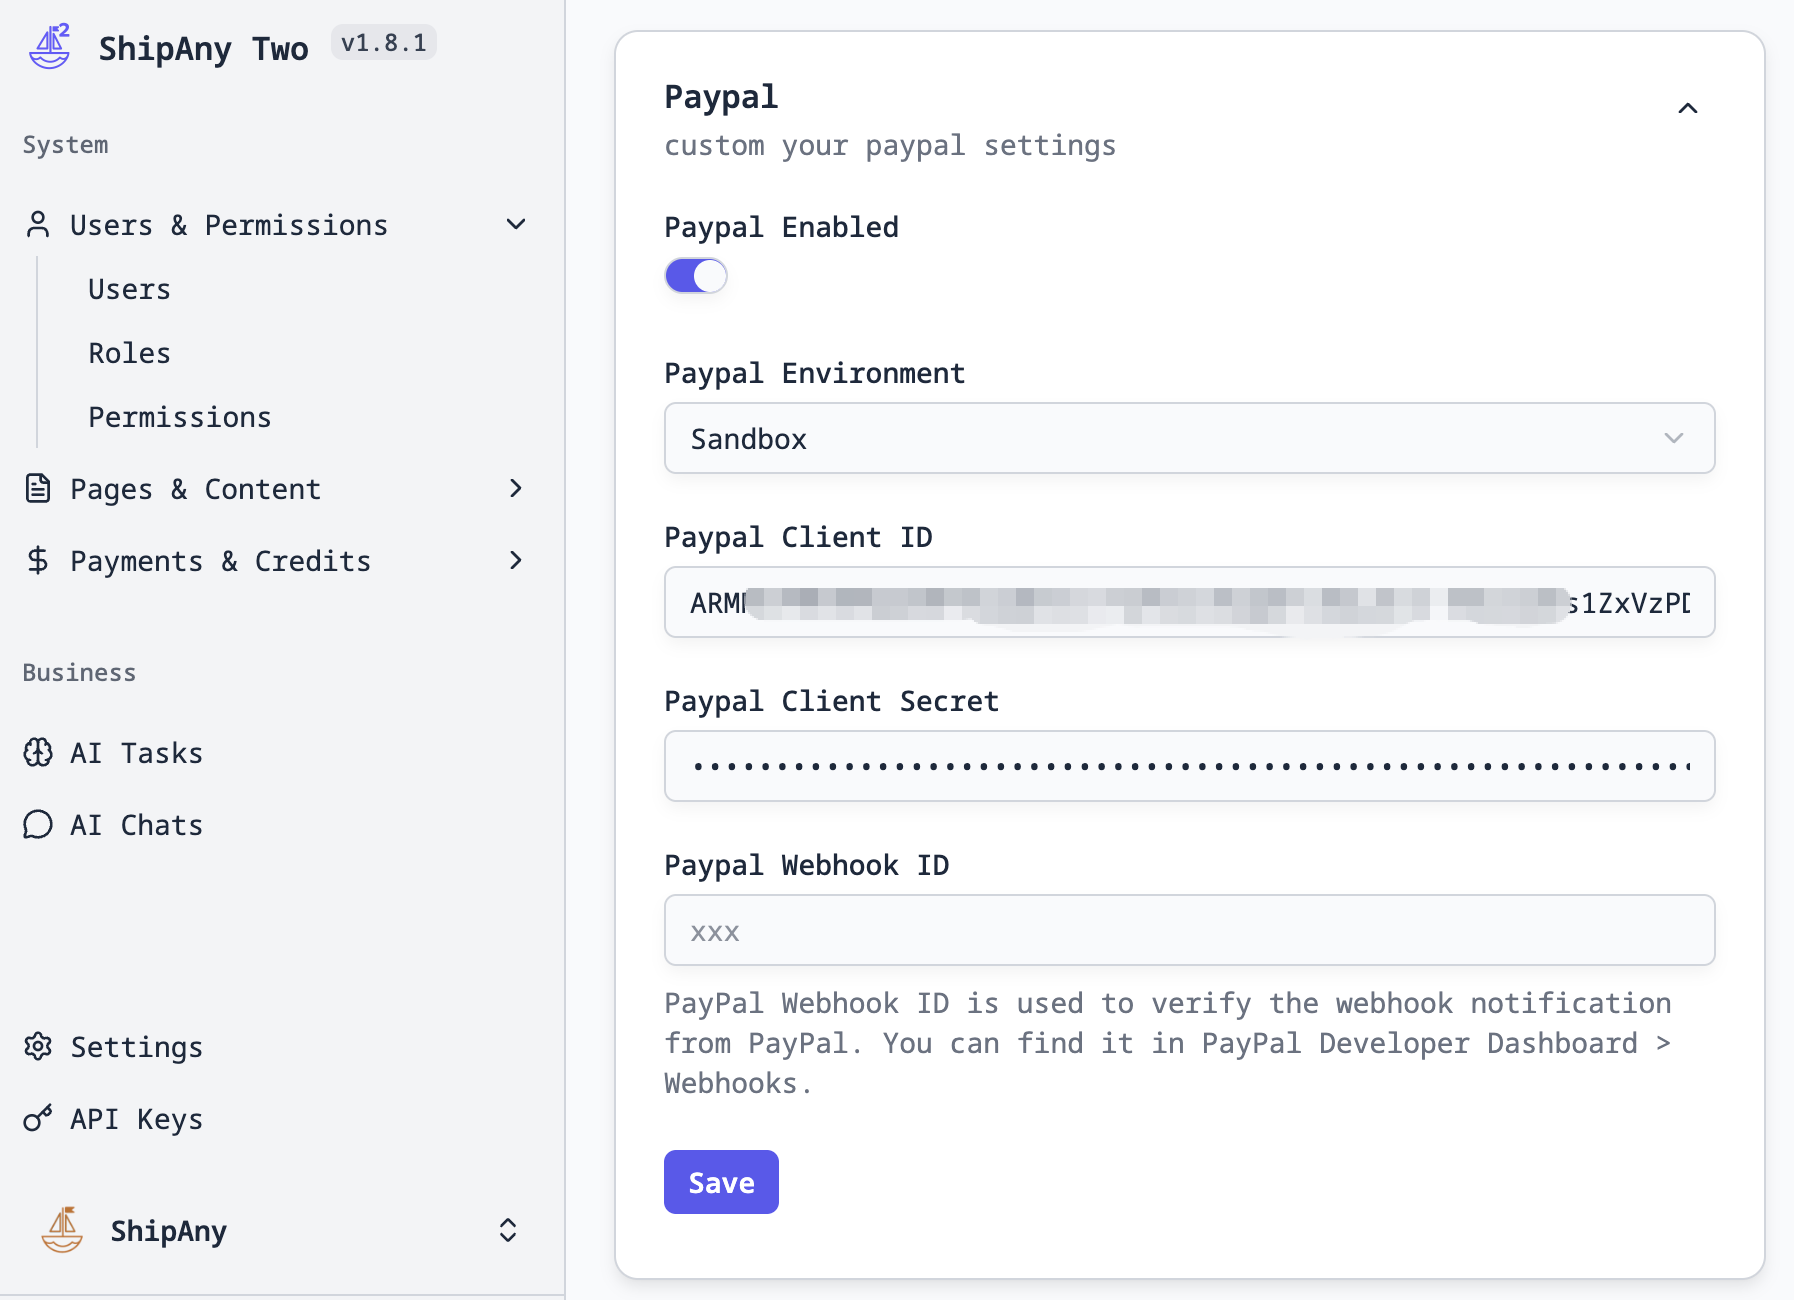
In the project admin console, go to Settings -> Payment -> Paypal and fill in the Paypal Client ID and Paypal Client Secret fields with the API Key and Secret from the previous step.
Paypal Webhook ID is the signature key for verifying payment notifications. You can leave it empty for now and fill it in after configuring payment notifications in later steps.
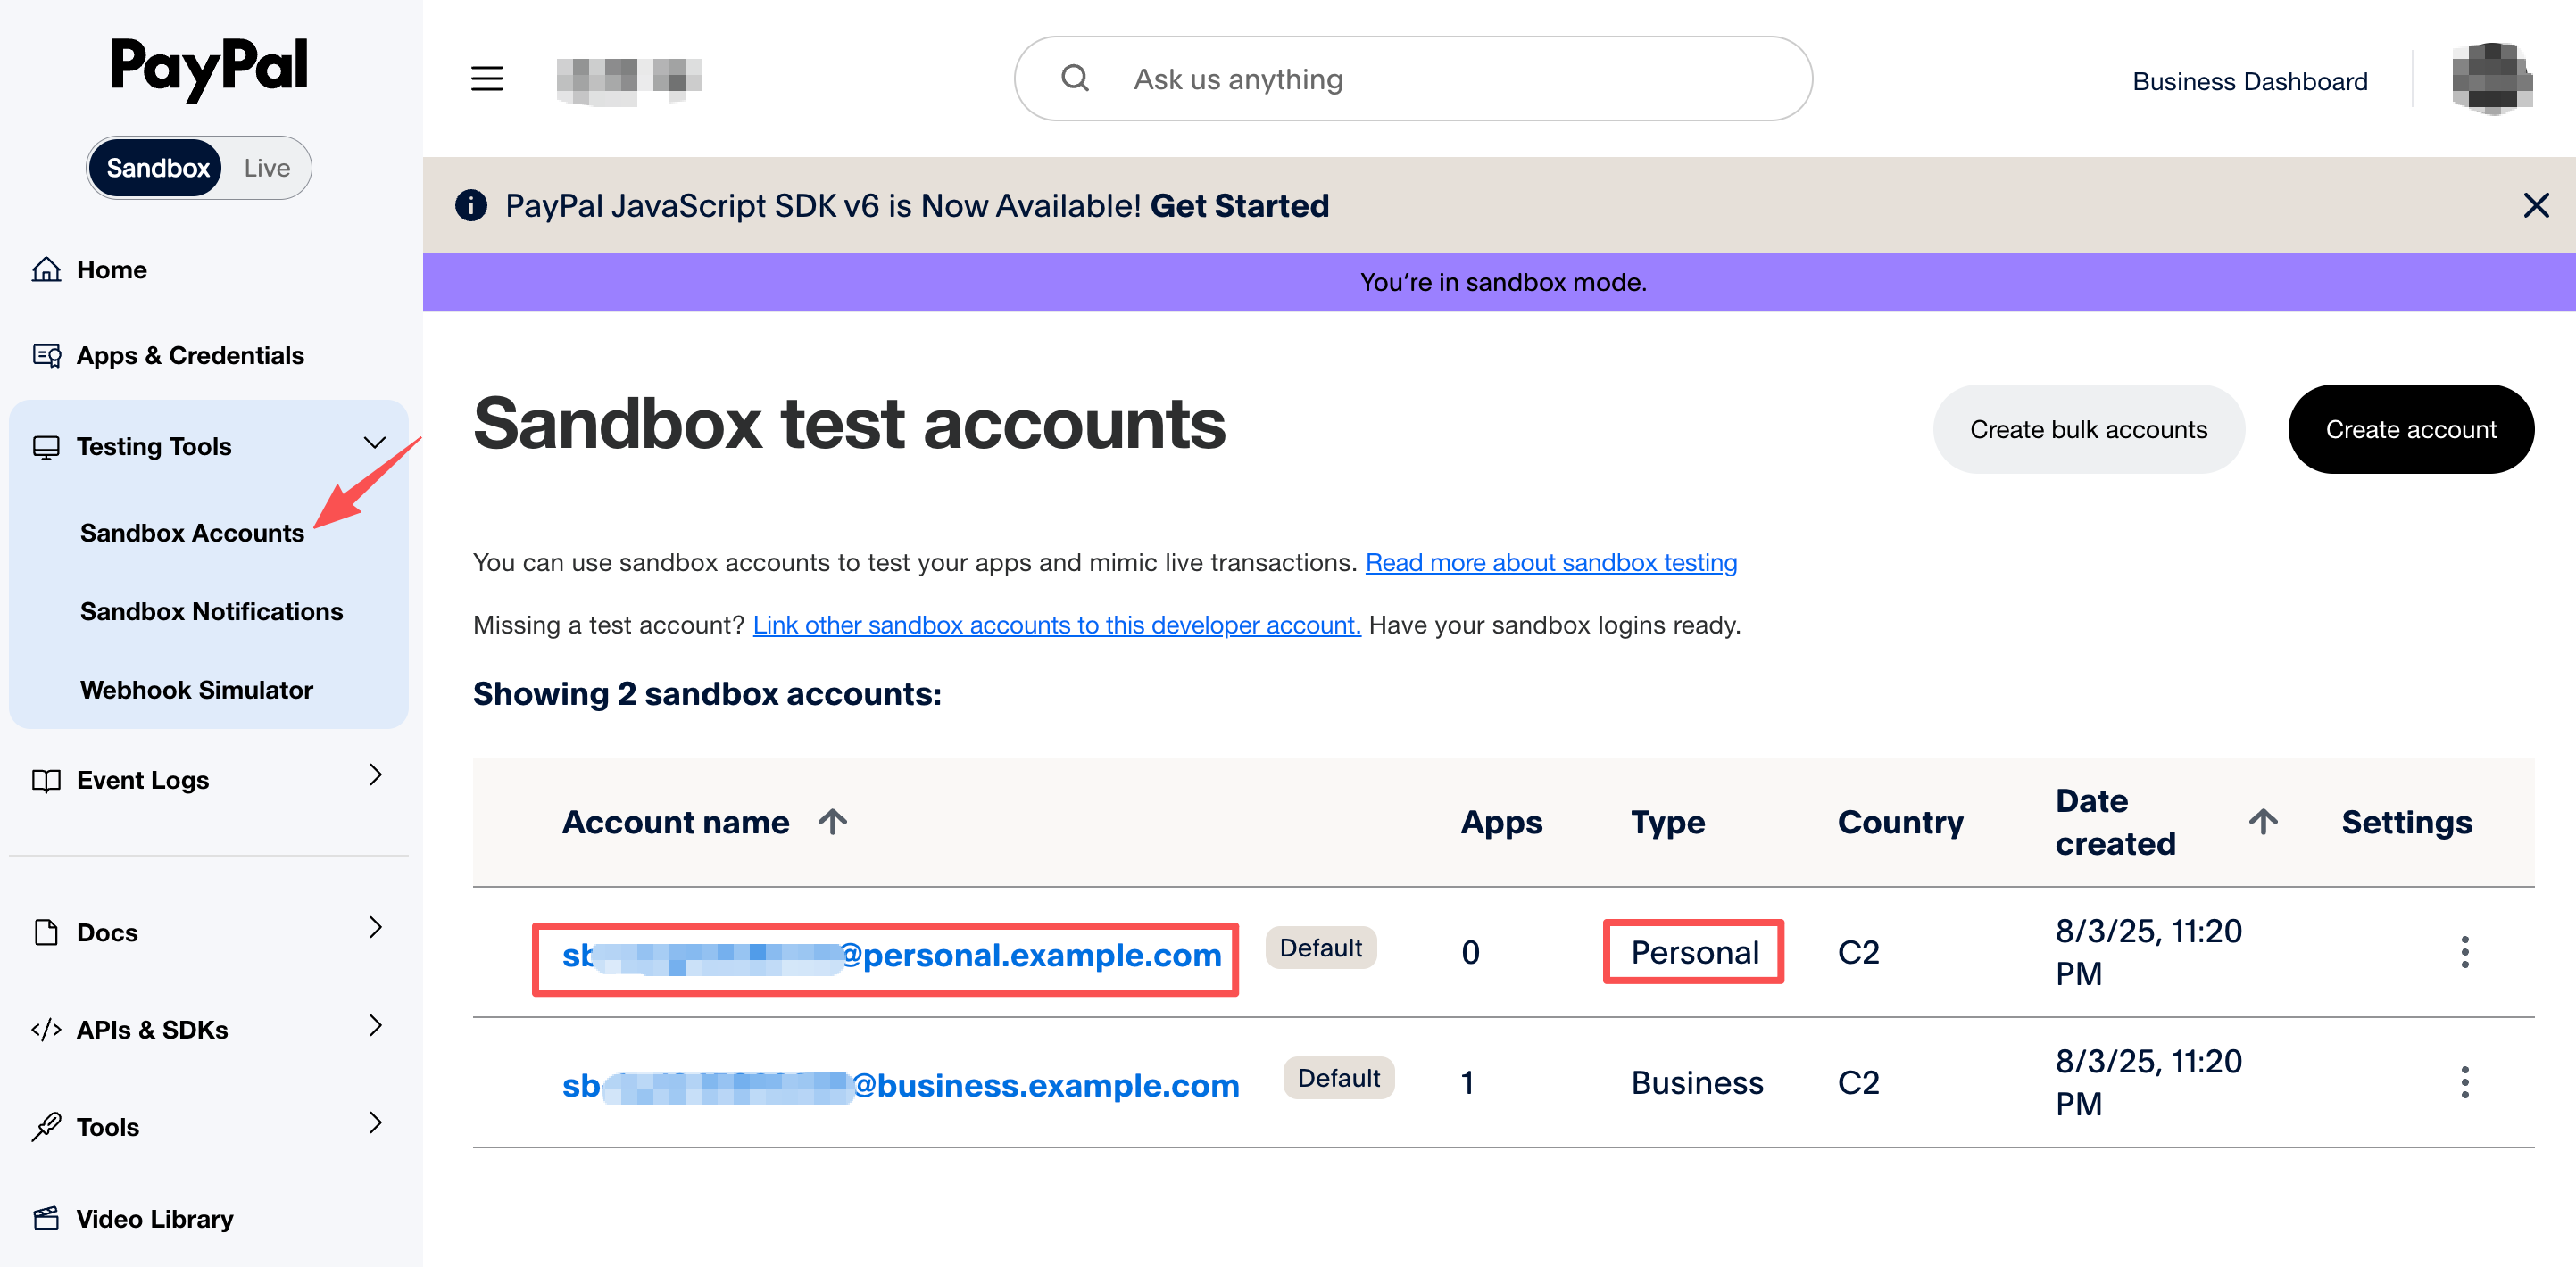
Log in to the PayPal Developer Dashboard with your PayPal business account credentials, go to Testing Tools -> Sandbox Accounts, select a Personal account, and copy the Email and Password for PayPal payment testing in the sandbox environment.
Visit the project's /pricing page, view the default pricing table, select a pricing plan, and click the checkout button.
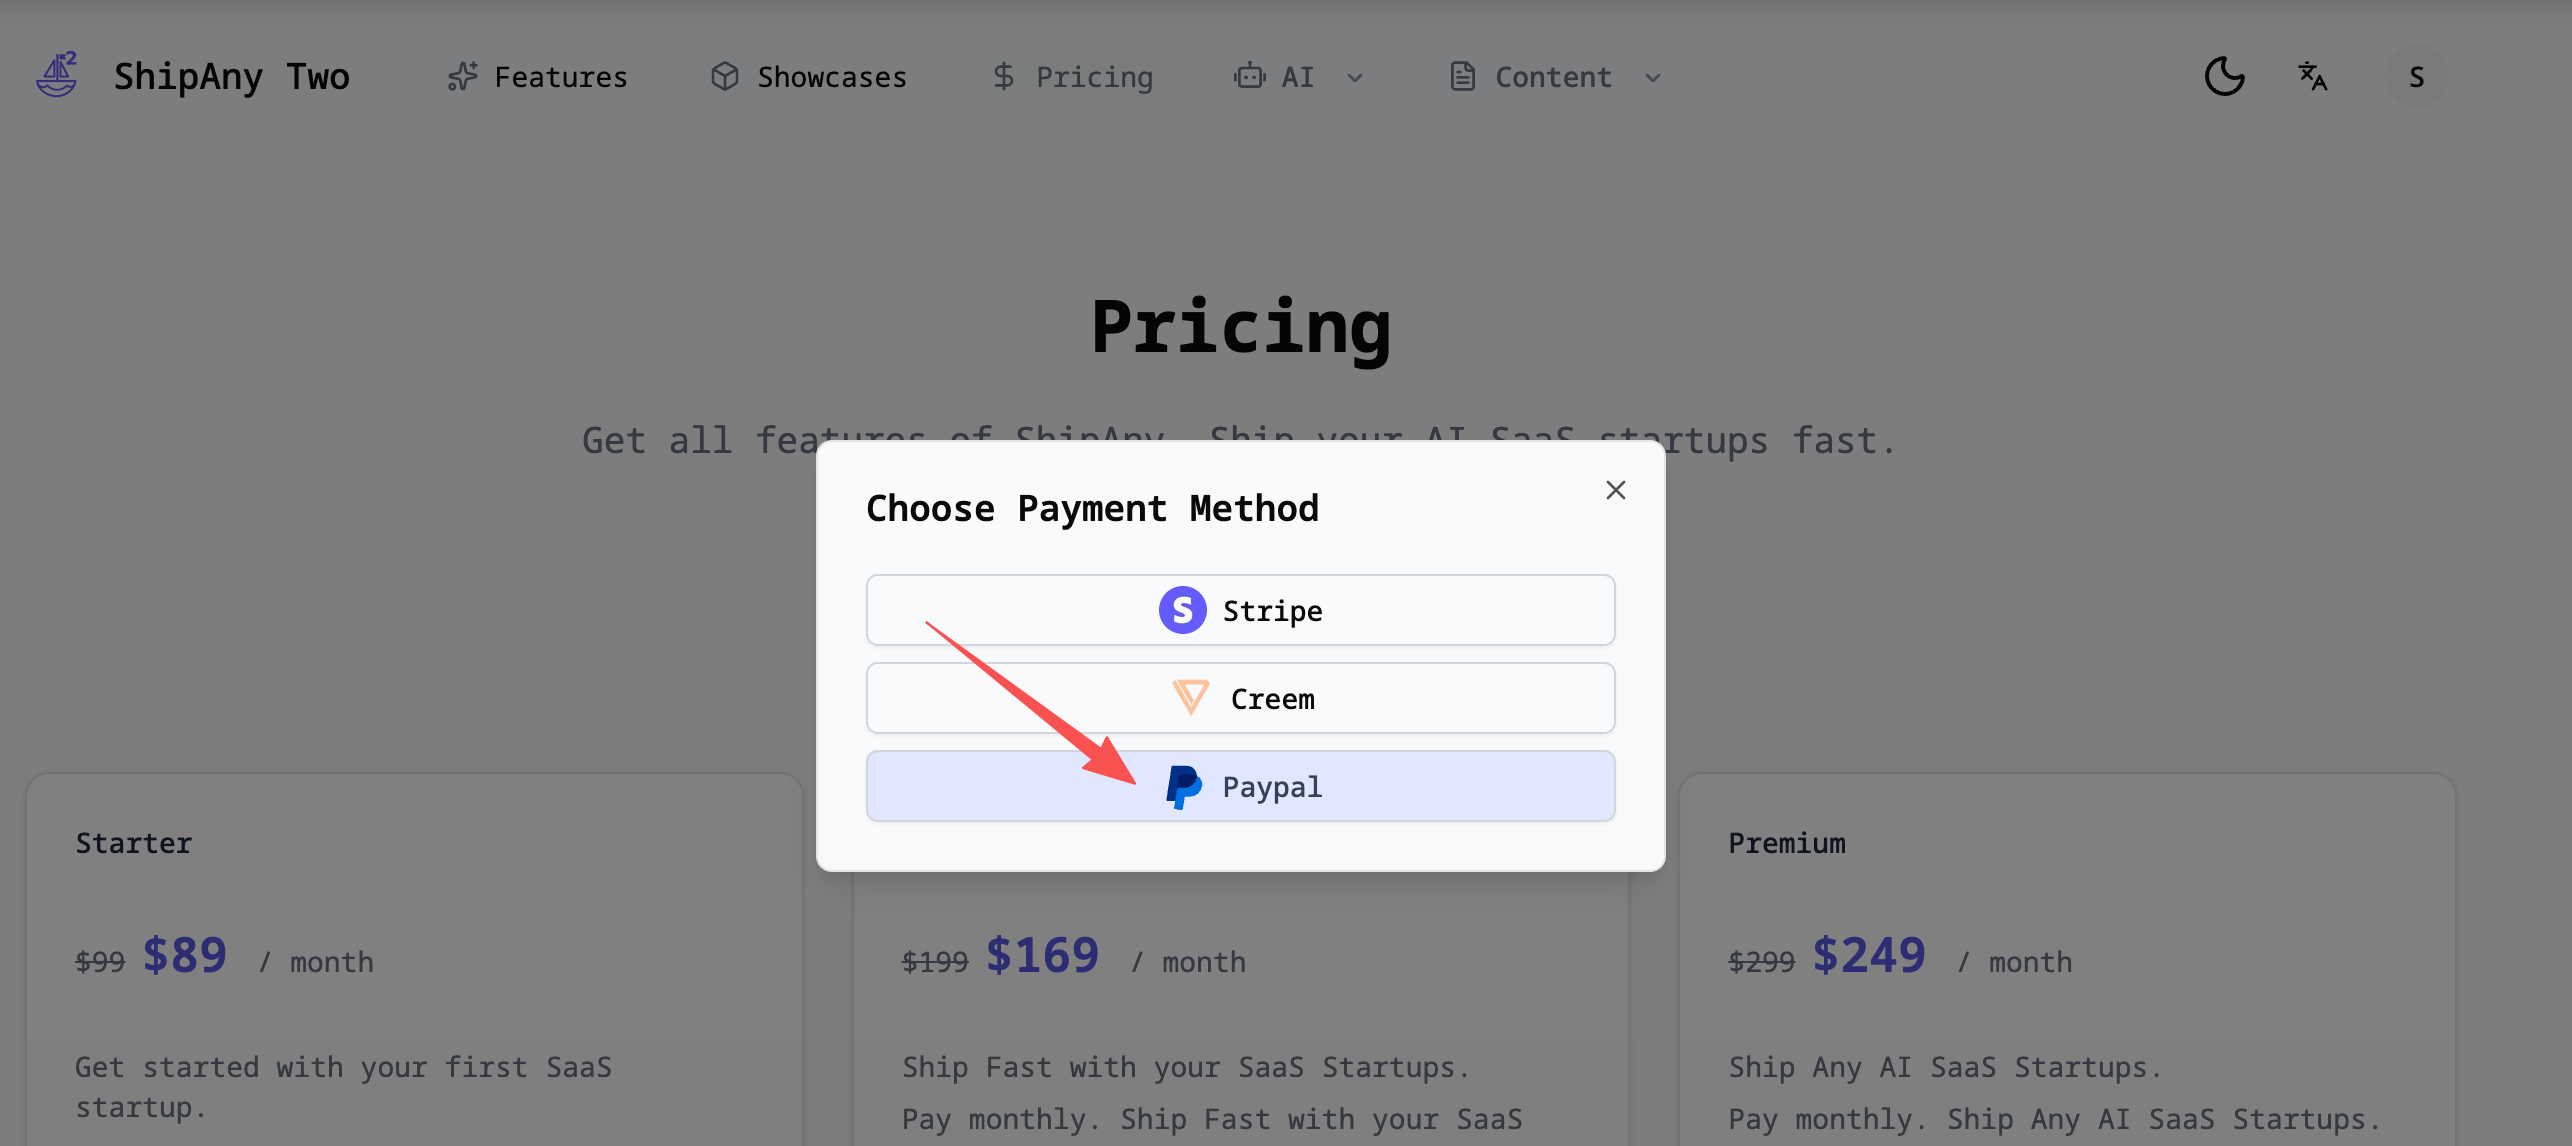
In the payment method selection dialog, choose Paypal. If it redirects to the PayPal payment page, the payment configuration is successful.
On the PayPal payment page, log in with the PayPal test account from the previous step to verify the PayPal payment functionality.
Log in to the PayPal Sandbox Merchant Dashboard with the Username and Password from Sandbox credentials in step 2 to view sandbox transaction orders.
For production, log in to the PayPal Merchant Dashboard with your business account credentials to view real transaction orders.
Design Pricing Table
The default pricing table is configured in src/config/locale/messages/{locale}/pages/pricing.json and supports multiple languages. Each locale corresponds to an independent pricing table configuration.
The project pricing table is independent of the payment provider. When integrating PayPal, you can refer to the Stripe payment guide: Design Pricing Table.
Configure Payment Callback
After a user selects a pricing plan on the pricing page and places an order, they will be redirected to the PayPal payment page. After successful payment, they will be redirected to the project callback endpoint: /api/payment/callback.
In the callback endpoint, the order status is updated based on the order number, then the user is redirected to the configured callbackUrl.
This callbackUrl is specified in the checkout endpoint: /api/payment/checkout:
const callbackUrl =
  paymentType === PaymentType.SUBSCRIPTION
    ? `${callbackBaseUrl}/settings/billing`
    : `${callbackBaseUrl}/settings/payments`;
By default, one-time payments redirect to /settings/payments, and subscription payments redirect to /settings/billing.
You can customize the redirect URL after payment completion based on your project requirements.
Note: Payment callbacks are synchronous redirects. If a user confirms payment on the PayPal payment page but closes the browser before the redirect completes, the order status won't be updated, and the user won't see the paid order in their account. This is called "lost orders".
To avoid lost orders from payment callbacks, we recommend configuring payment notifications in the PayPal dashboard when going live.
Configure Payment Notifications
Log in to the PayPal Developer Dashboard, go to Apps & Credentials, select the default app, scroll to the bottom, and click Add Webhook to add a webhook URL.
Webhook URL: Enter the URL that will receive notifications. It must be a publicly accessiblehttpsURL in the following format:
https://{your-domain.com}/api/payment/notify/paypalReplace {your-domain.com} with your project domain (root or subdomain).
Event types: ClickAll Eventsto select all events.
Alternatively, you can select only specific events. Payment notification events supported in ShipAny include:
CHECKOUT.ORDER.APPROVED               # One-time payment authorized (optional, for pending status)
CHECKOUT.ORDER.COMPLETED              # One-time payment succeeded
BILLING.SUBSCRIPTION.ACTIVATED        # Subscription activated
BILLING.SUBSCRIPTION.CANCELLED        # Subscription cancelled
BILLING.SUBSCRIPTION.PAYMENT.FAILED   # Renewal failed
PAYMENT.SALE.COMPLETED                # Subscription renewal succeeded
PAYMENT.CAPTURE.REFUNDED              # One-time payment refunded
PAYMENT.SALE.REFUNDED                 # Subscription refunded
After filling in the configuration, click Save to add the webhook URL.
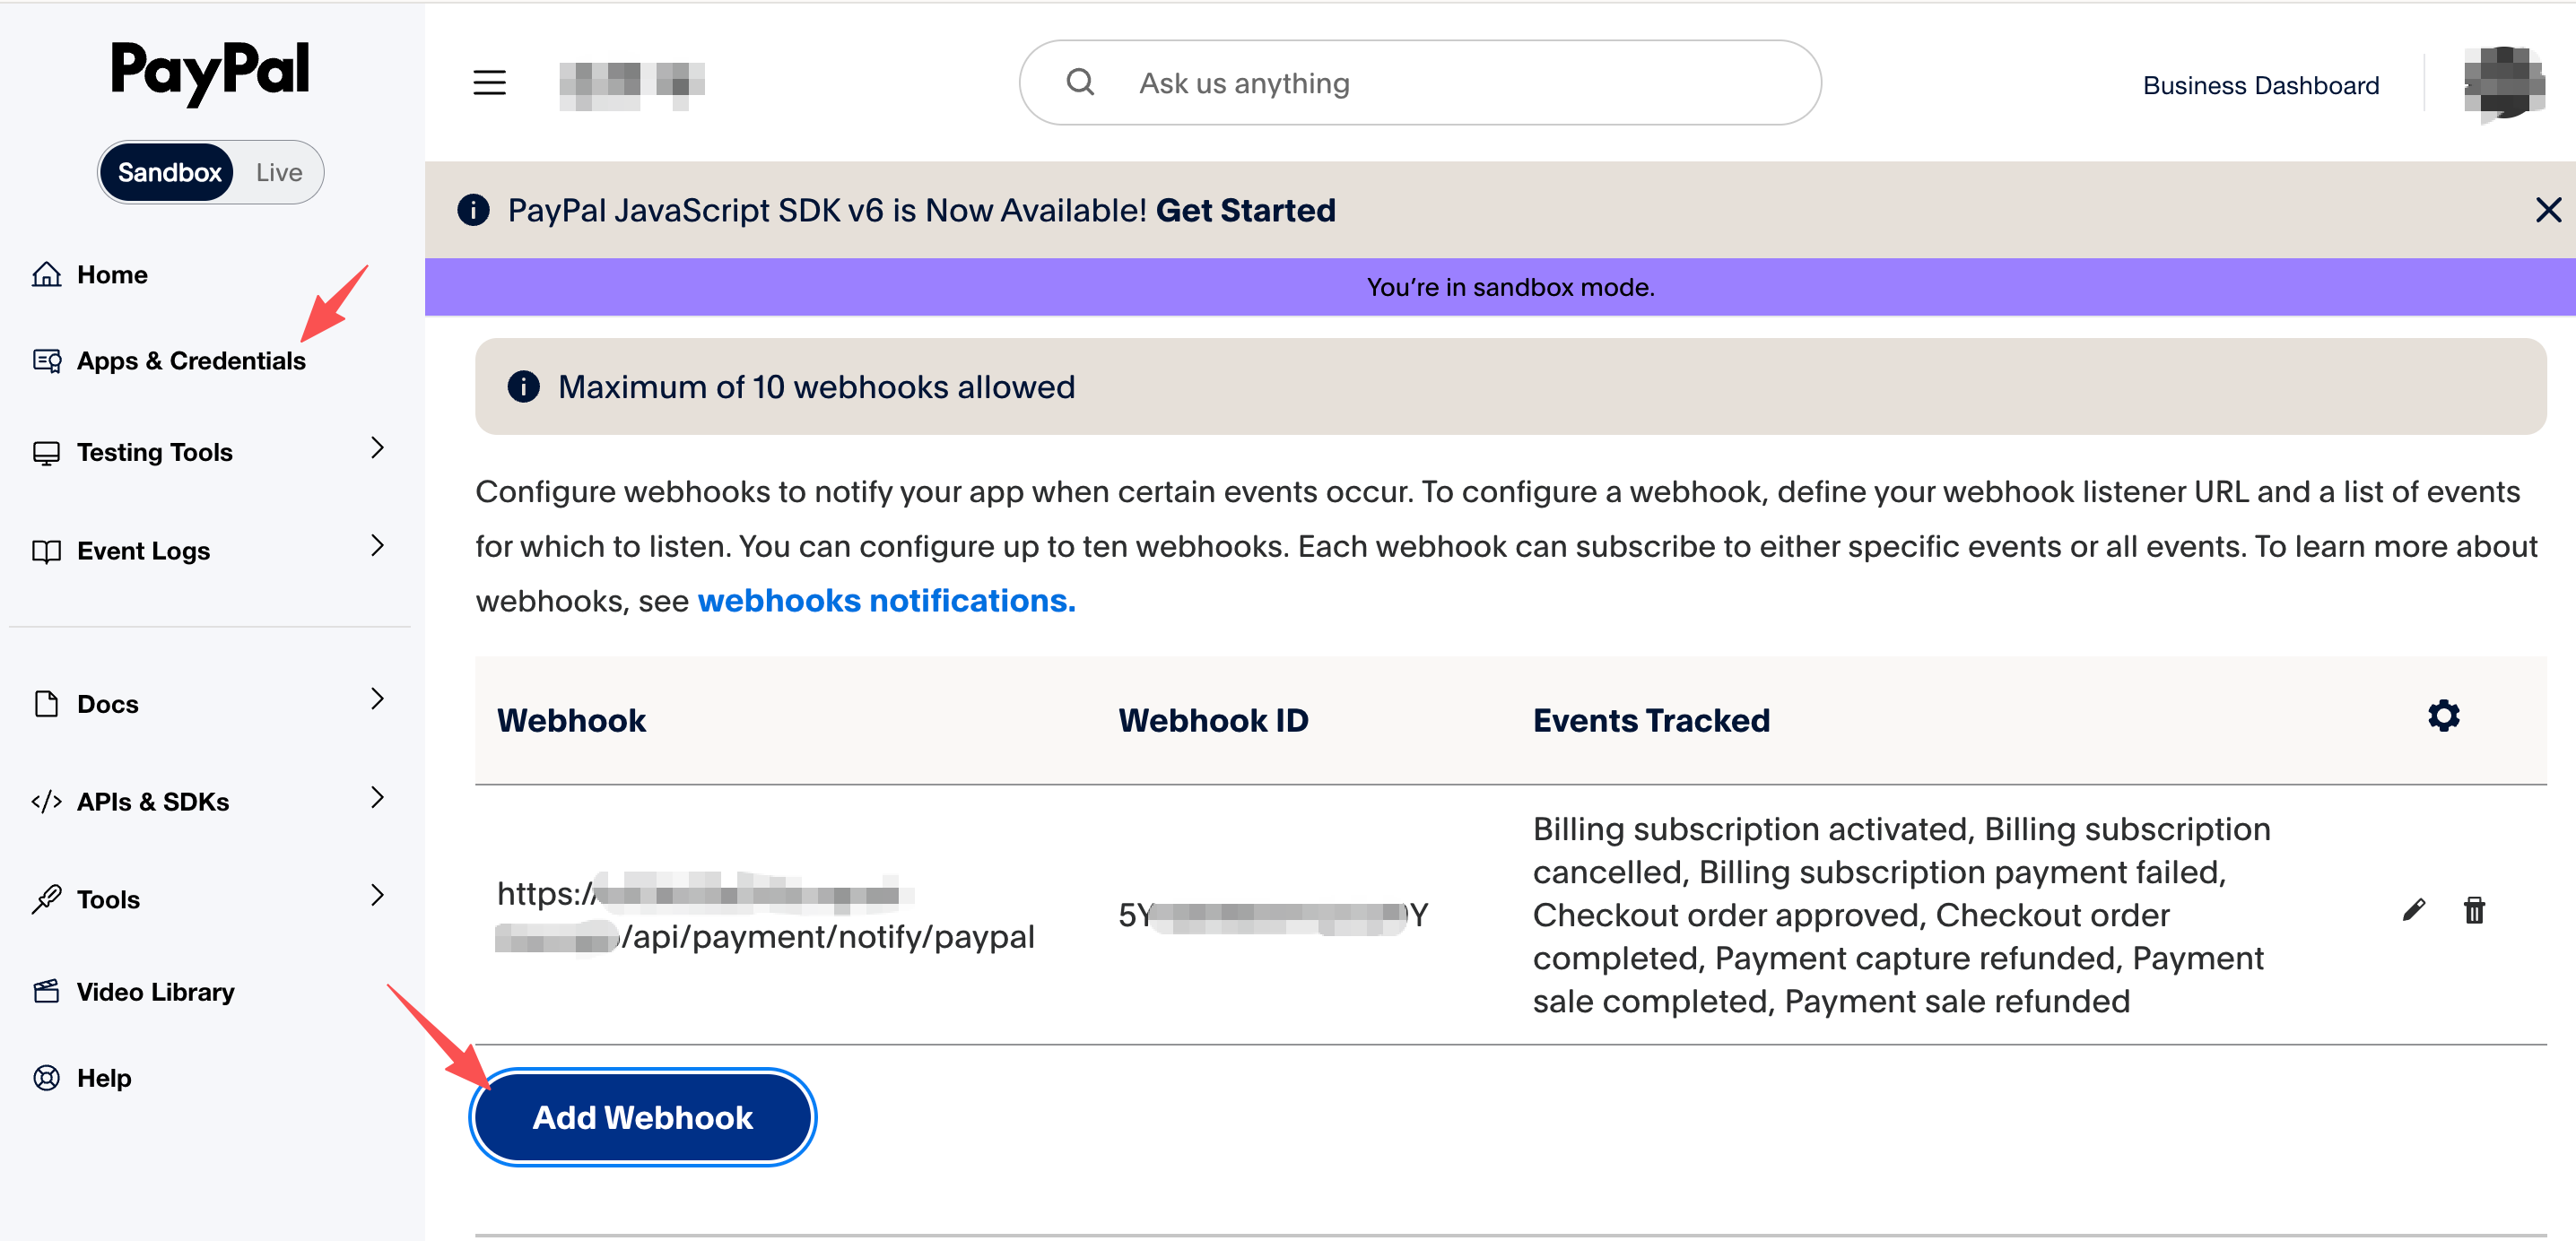
After creating the webhook URL, on the webhook list page, copy the Webhook ID, which is the signature key for payment notifications.
In the project admin console, go to Settings -> Payment -> Paypal and fill in the Paypal Webhook ID field with the webhook signature key copied in the previous step.
Local Webhook Testing
The steps for local webhook testing are the same across payment providers. The core idea is to use a tunnel (e.g., ngrok) to map a public URL to your local development machine, then configure that public URL as the webhook URL in the payment provider dashboard.
For example, after setting up a tunnel with ngrok, the webhook URL configured in the PayPal dashboard would look like:
https://xxx.ngrok-free.app/api/payment/notify/paypalFor detailed steps, refer to the Stripe payment guide: Local Webhook Testing.